
This post may contain affiliate links. As an Amazon Associate, We earn from qualifying purchases if you buy through our links at no extra cost to you. Please read our full disclosure here.
If you’ve ever walked into a festival or rave and immediately felt your eyes go wide at someone’s wrist absolutely stacked with colorful beaded bracelets
Yeah Yeah, that’s Kandi.
And if you’ve ever thought I want that, you’re in the right place.
The good news? You don’t need a fancy craft room, a massive bead collection, or years of jewelry-making experience to start.
Small kandi ideas are actually the best place to begin.
They use fewer beads, come together in under an hour, and cost almost nothing to make.
Oh, and they trade beautifully.
What You Need to Get Started
Before we get into the actual ideas, let me save you a trip down a very long Amazon rabbit hole. Kandi is wonderfully low-supply. Here’s what you actually need:

- Upgraded Bracelet Making Kit: 3 boxes contains about 1250pcs pony beads in 48 colors, about 30pcs polymer clay beads in …
- Special Colors: Along with solid color pony beads,you’ll recive 3 special types of pony beads: AB color with iridescent …
Pony beads. These are the small, barrel-shaped plastic beads that are the backbone of almost all kandi. They come in solid colors, transparent, glow-in-the-dark, and iridescent.
Elastic cord. This is non-negotiable. You want 0.5mm to 1mm elastic, sometimes sold as “stretch magic” or “bead elastic.” A thicker cord (1mm) is more durable and easier to thread. For wrist bracelets, around 12 inches of cord per bracelet is a solid starting point.
20 Small Kandi Ideas to Make Even If You’re a Total Beginner
1. Solid Color Bracelet
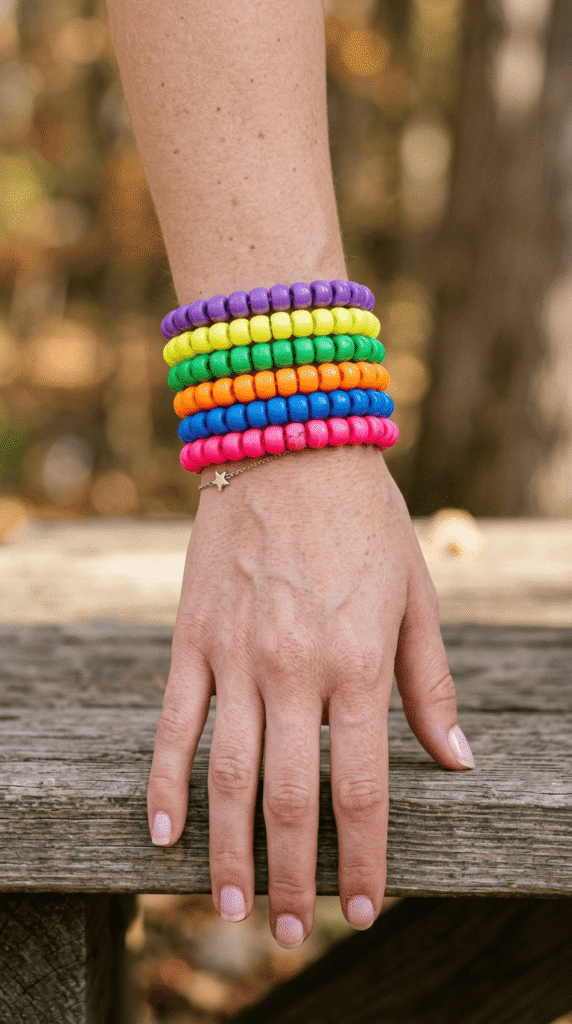
Pick a color that means something to you, or just whatever makes you happiest when you look at it.
Thread your beads onto your elastic, tie off with a surgeon’s knot (more on that in the tips section), and you’re done. This is the perfect first project.
2. Ombre Fade Bracelet
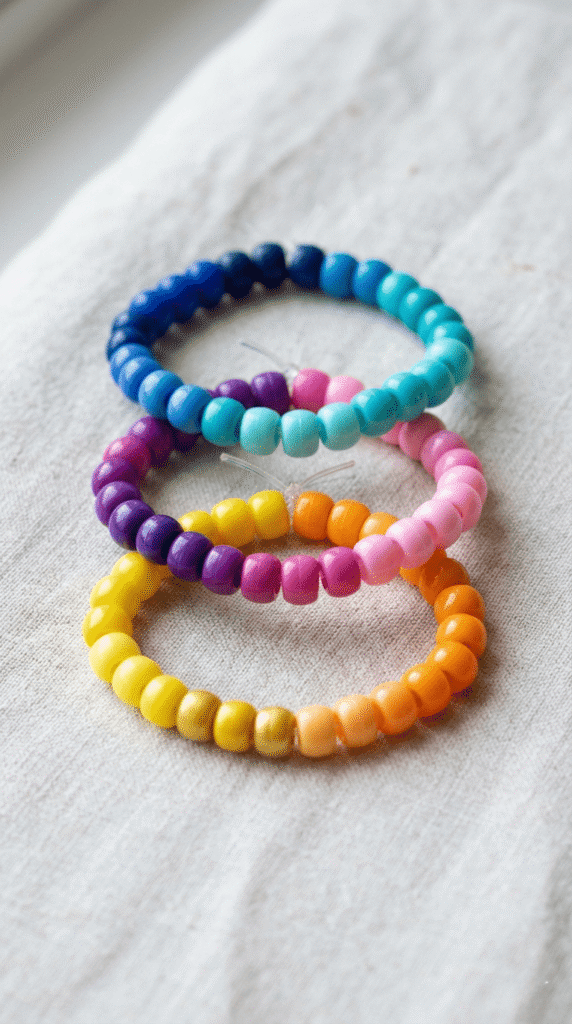
Start with 4–5 beads of color A, then mix in 1 of color B, then 2, then 3, until you’re mostly or fully in color B. Done.
The gradual shift creates a sunset-like effect that photographs incredibly.
3. Name or Word Bracelet
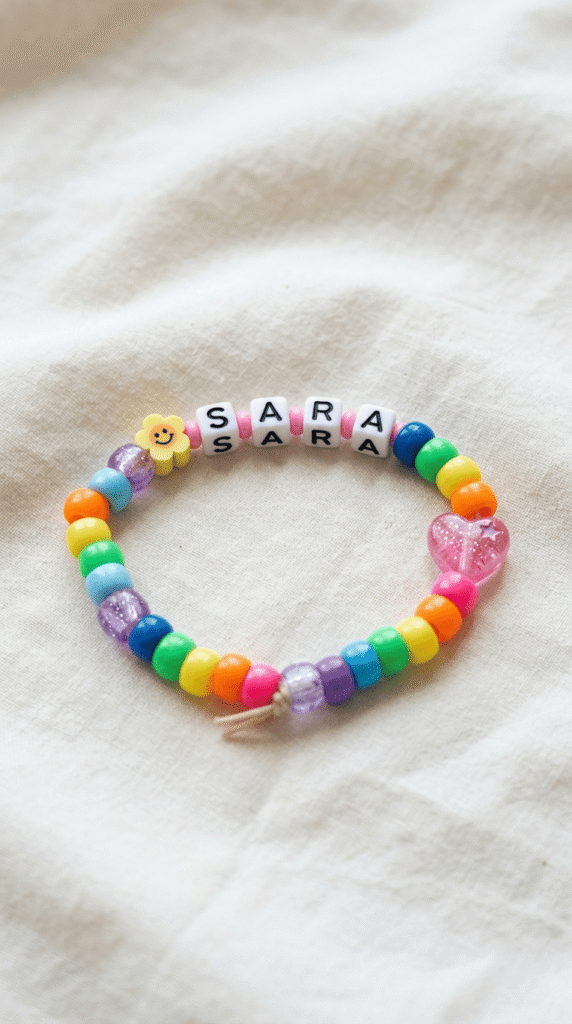
This is one of the most requested small kandi ideas because it personalizes everything.
You spell out a name, a word, or a phrase using letter beads (sold separately from pony beads, look for “alphabet pony beads”) and fill the rest of the bracelet with colors.
Keep it short for a single bracelet: your name, your festival name, “PLUR,” “RAVE,” “LOVE,” or a friend’s nickname.
Longer phrases work better on cuffs.
4. Smiley Face Bracelet
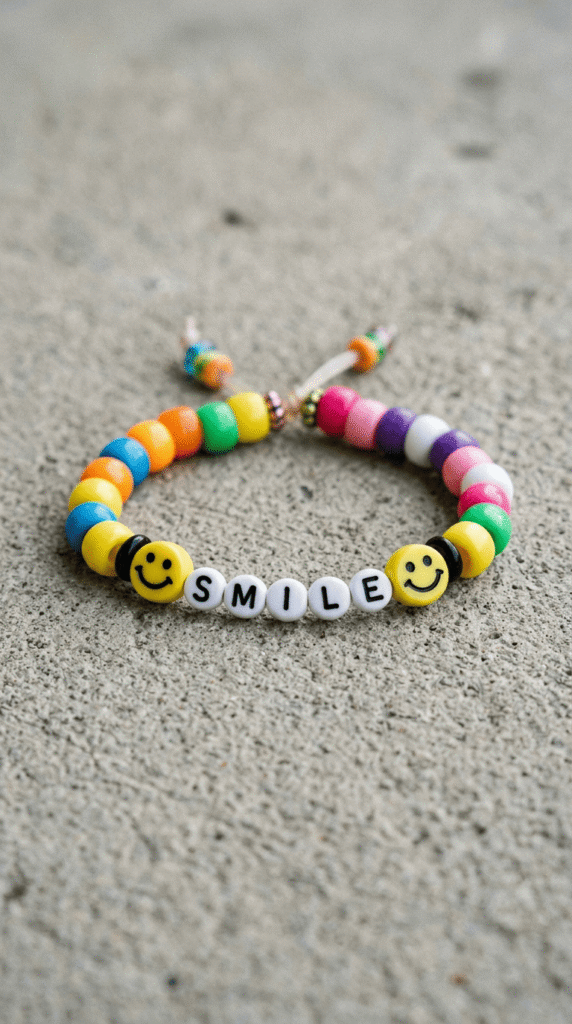
Happy face bracelets are festival staples for a reason: they’re immediately joyful, they’re recognizable from a distance, and they take about 20 minutes to make.
You’ll find smiley face pony beads sold pre-made (one bead, one face), or you can use a yellow bead with two black beads for eyes and a curved row of white beads for a mouth if you’re working with regular pony beads.
The pre-made faces are easiest and most widely available.
5. Pastel Rainbow Bracelet
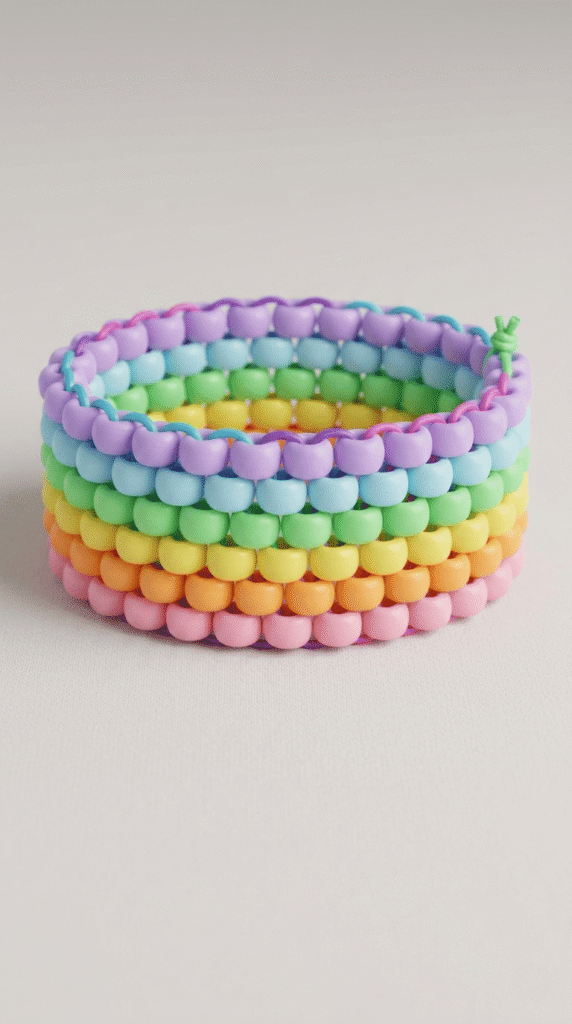
ROYGBIV but make it soft. Instead of saturated primaries, use pastel versions of each color of the rainbow: baby pink, peach, butter yellow, mint, sky blue, and lilac.
The result is dreamy and pairs beautifully with festival fashion.
Thread them in rainbow order, or mix them randomly for a cotton-candy effect. Both work.
6. Checkered Bracelet
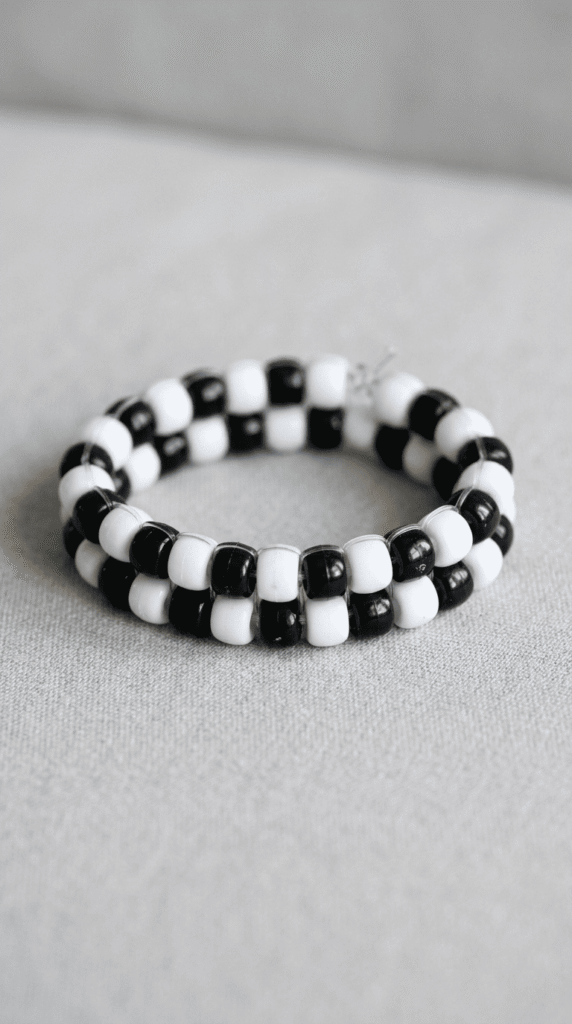
Two alternating colors, placed in a repeating sequence.
It sounds simple because it is, but the visual result is punchy and graphic.
Black and white is the classic. Neon pink and black are very 2000s in the best way. Red and white feel sporty.
Thread color A, color B, color A, color B, all the way around. Done. The secret is picking colors with high contrast so the pattern actually reads.
7. Zigzag Stripe Bracelet
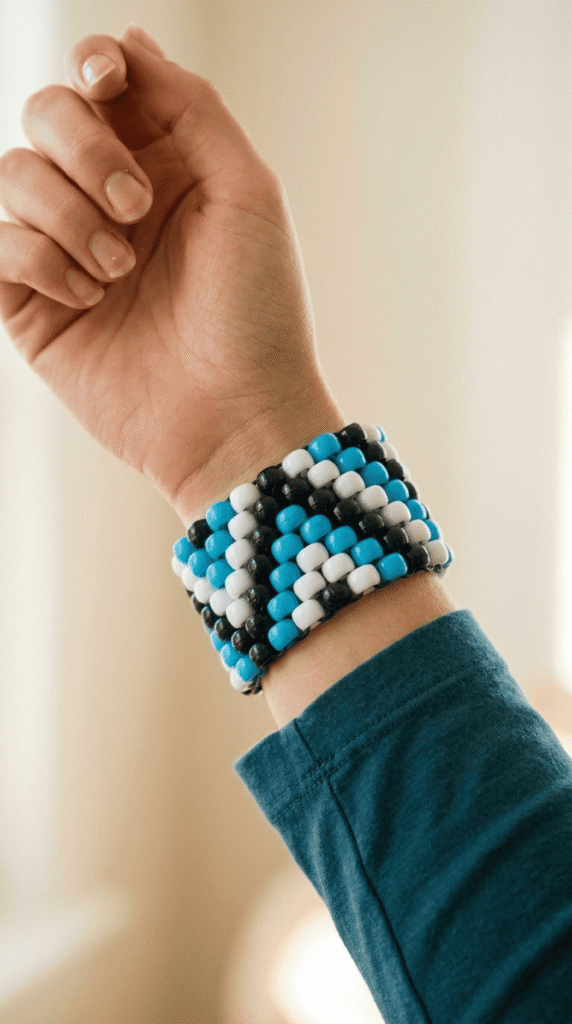
Similar to a checkerboard in concept, but you run 2–3 beads of each color in sequence instead of alternating one-by-one.
This creates a diagonal stripe effect that zigzags around the bracelet.
A sequence like 3 blue, 3 white, 3 blue, and 3 white gives you a clean nautical stripe. Bump it up to 4-bead sections for chunkier stripes.
8. Heart Motif Bracelet
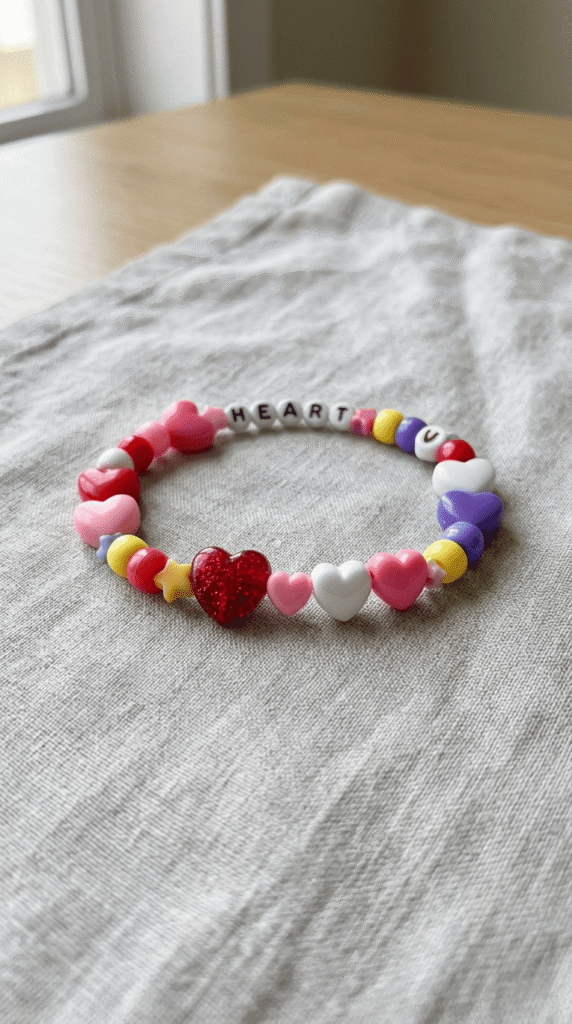
To get a heart on a single-strand bracelet, you’ll either use heart-shaped pony beads (yes, they exist, and they’re wonderful) or you’ll work with colored beads in a sequence designed to suggest a heart shape when the bracelet is worn flat.
The easiest version: use pink or red heart beads as accent pieces, spaced evenly around the bracelet with solid beads between them. The bracelet becomes a string of little hearts.
9. Starburst Pattern Bracelet
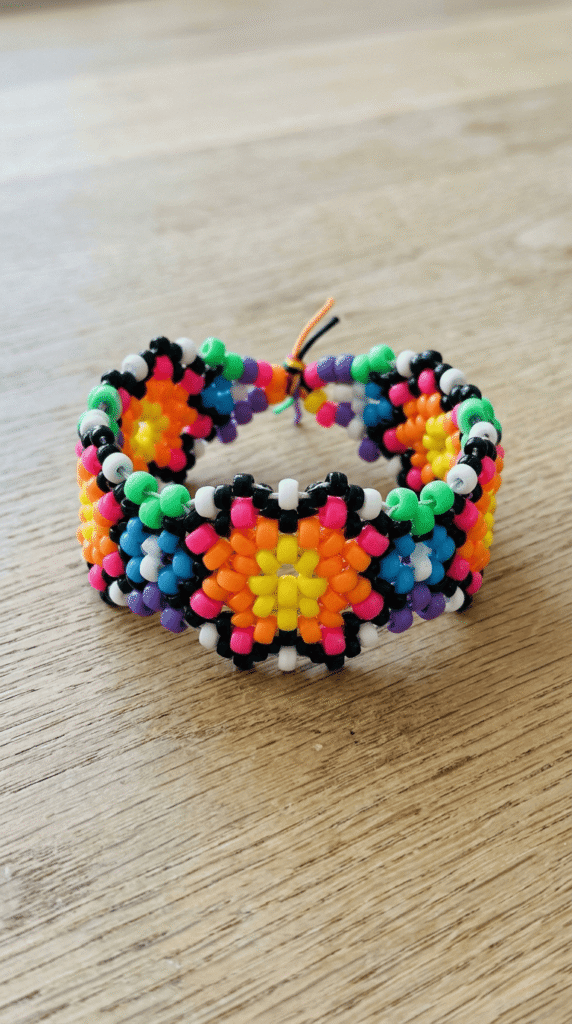
This uses a center bead (usually a larger or contrasting bead) flanked by radiating colors to suggest a starburst or sunburst.
On a single strand, you’re essentially creating a repeating starburst motif that circles the wrist.
10. Stripe Stack Set
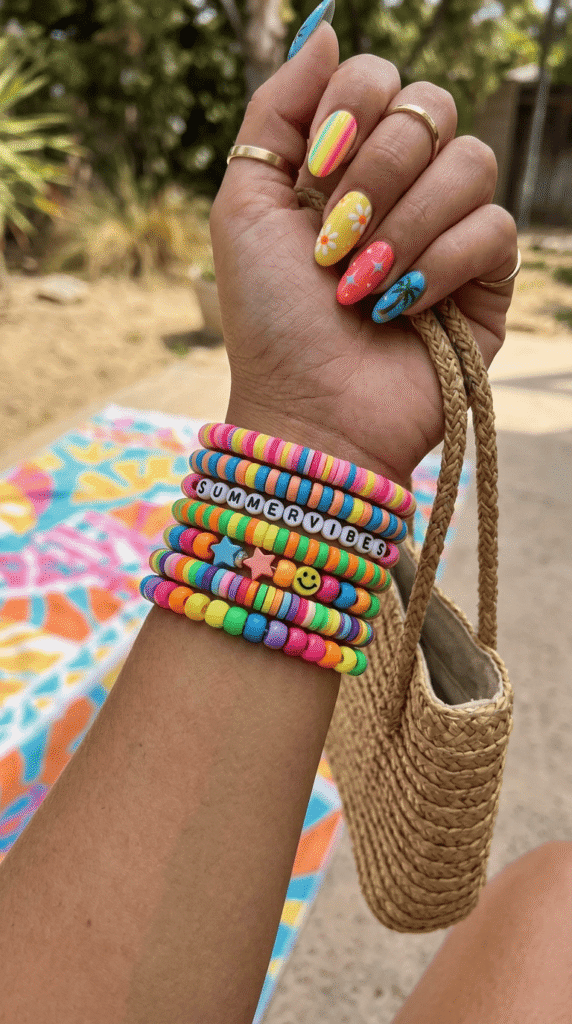
This isn’t one bracelet; it’s a matched set of three or four bracelets designed to be worn together, each with a slightly different stripe combination using the same color palette.
Bracelet one might be all-over stripes. Bracelet two might have wider stripes. Bracelet three might be mostly one color with stripe accents.
Together, they look intentional and cohesive.
This is a great approach when you’re making kandi for a specific outfit.
11. X-Base Cuff (Beginner Cuff)
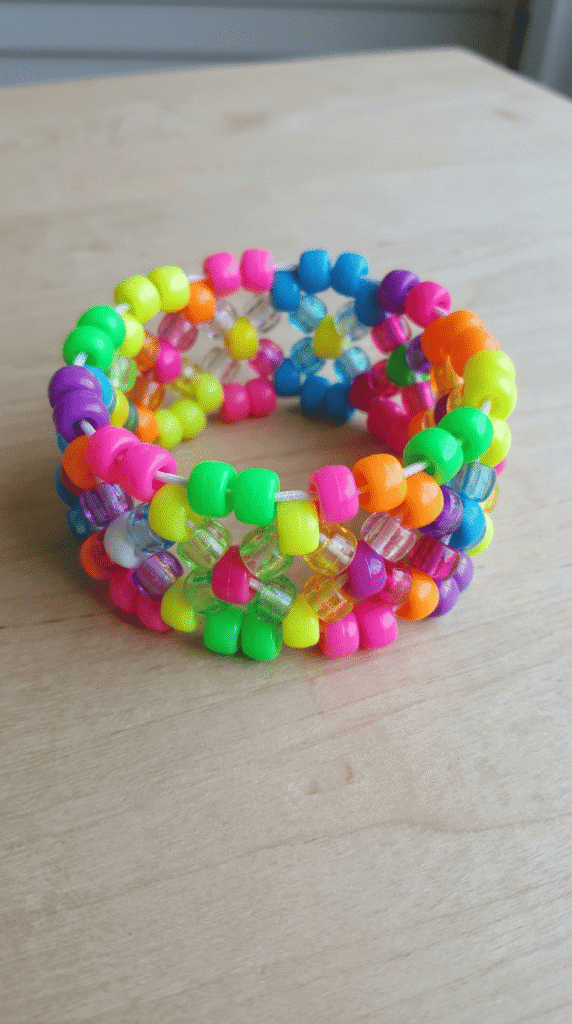
The X-base weave is the entry point for cuff-making.
You thread two strands through each bead in a crossing pattern, building width, row by row.
It sounds more complicated than it is. There are excellent video tutorials online, and most people get the hang of it within one sitting.
A small X-base cuff might be 3 rows tall and cover about an inch of wrist.
It’s enough to feel like a statement without being overwhelming.
12. Safety Pin Charm Bracelet
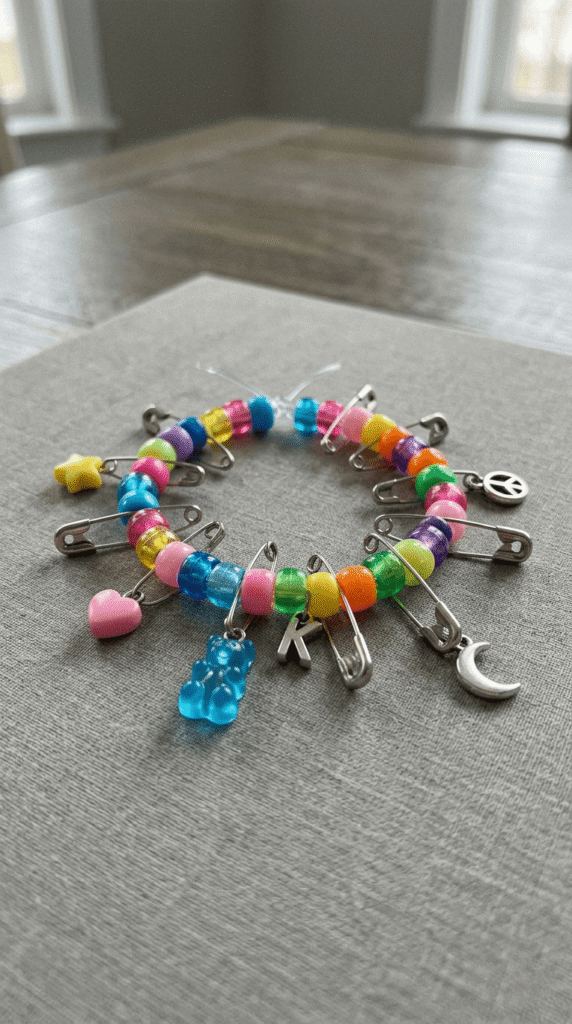
Safety pins threaded with small seed beads or micro pony beads make incredibly cute charms.
You string a few beads onto an open safety pin, close it, and attach it as a dangle to a regular single-strand bracelet.
It’s a technique borrowed from punk fashion, and it gives kandi a really cool edgy-meets-sweet contrast.
Make a few pins in rainbow colors and attach them all.
13. Mini Mask Pendant Bracelet
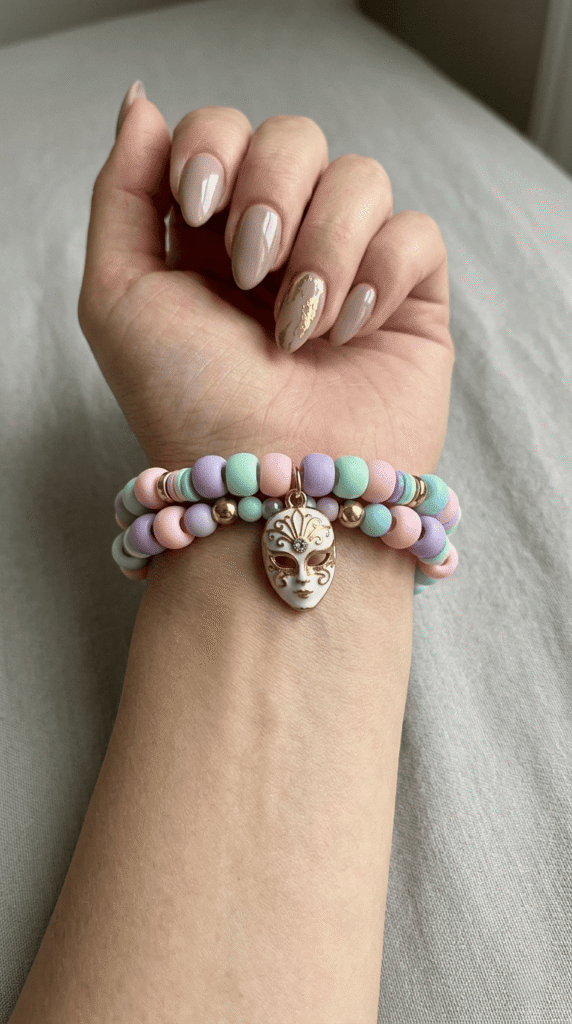
Festival culture and kandi are deeply intertwined with rave masks, so a tiny mask-shaped pendant bead or a small assembled mask charm from beads makes perfect thematic sense.
Mask-shaped beads do exist; otherwise, a simple diamond or teardrop bead can suggest a mask shape when framed right.
Center the pendant at the bottom of a single-strand bracelet so it hangs down when worn.
14. Mushroom Charm Bracelet
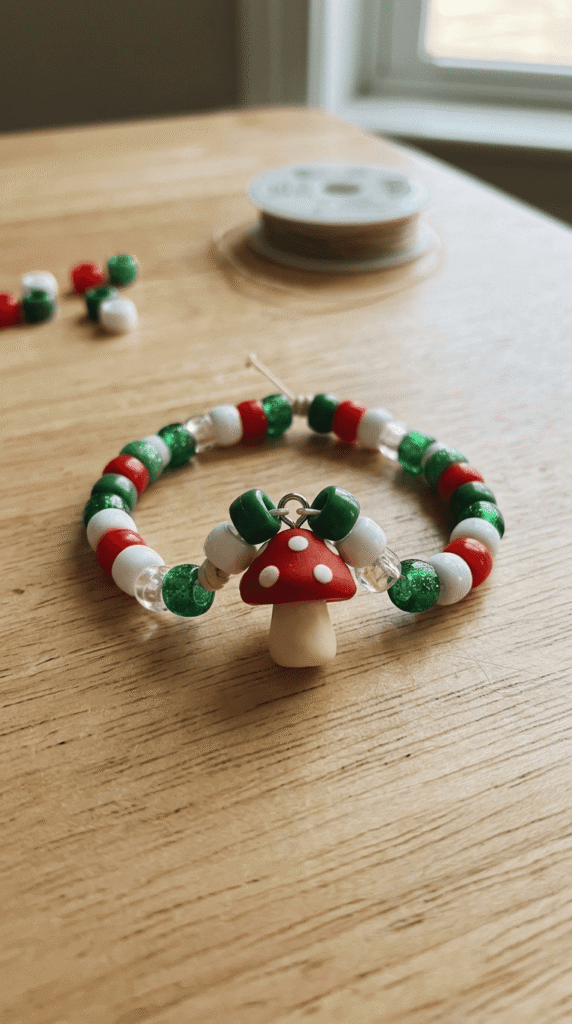
Cottagecore met rave culture, and mushroom kandi was born.
Mushroom-shaped pony beads are widely available and have been trending for a few years now, with no signs of stopping.
A simple single-strand bracelet with mushroom beads as accent pieces looks charming, whimsical, and immediately giftable.
Alternate red mushroom beads with white beads for classic fairy-tale vibes, or mix colors for a psychedelic woodland feel.
15. Flower Peyote Stitch Bracelet
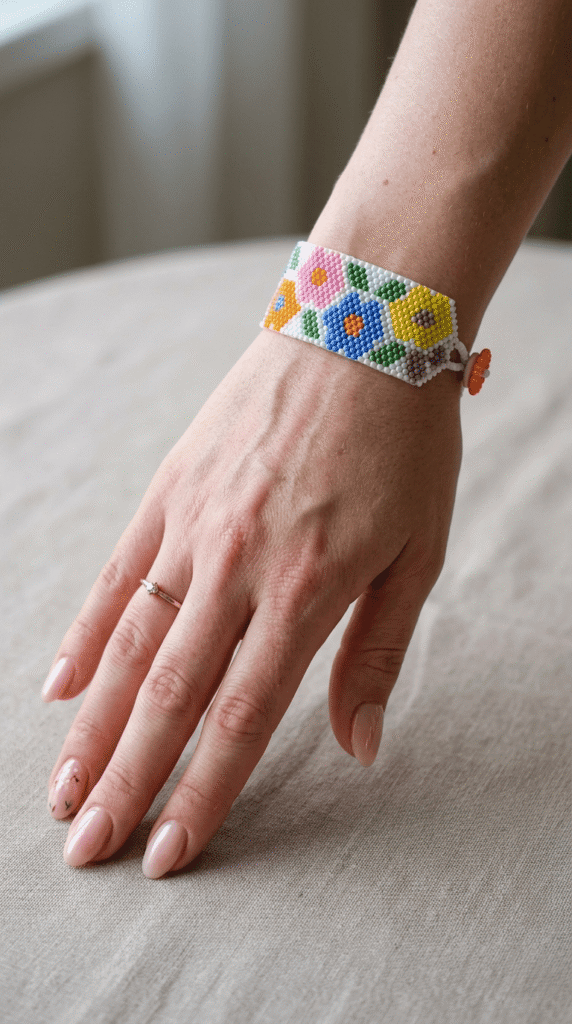
Peyote stitch is a beading technique that creates a flat, fabric-like weave.
A beginner peyote piece might be a small flower motif worked in 3–4 colors, something like a simple daisy or sunflower.
It takes more patience than single-strand bracelets, but the result is genuinely impressive and unlike anything you can get from a single strand.
Small peyote pieces are also wonderful as pendants or bag charms if you don’t want to make a full bracelet.
16. Pixel Art Face Bracelet
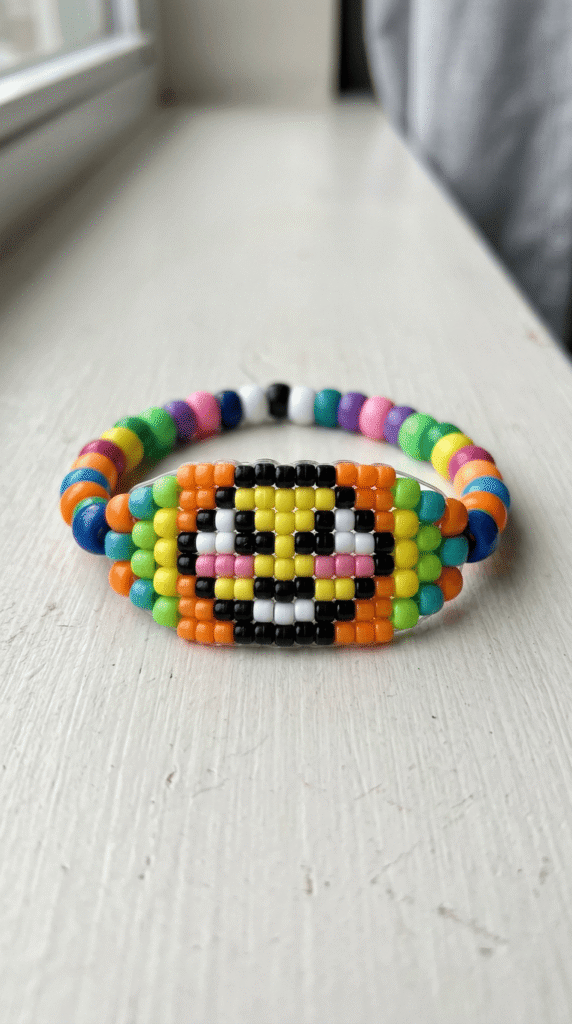
Using an X-base cuff technique, you can create simple pixel art faces: a basic smiley, a cat, a skull, and a ghost. Think 8-bit video game sprites: simple, bold, and immediately readable.
Find a pixel art sprite online (or design your own on graph paper), translate each pixel to a bead color, and build it row by row.
Start with something small: a 10-bead wide by 8-bead tall sprite is very manageable.
17. Music Note Bracelet
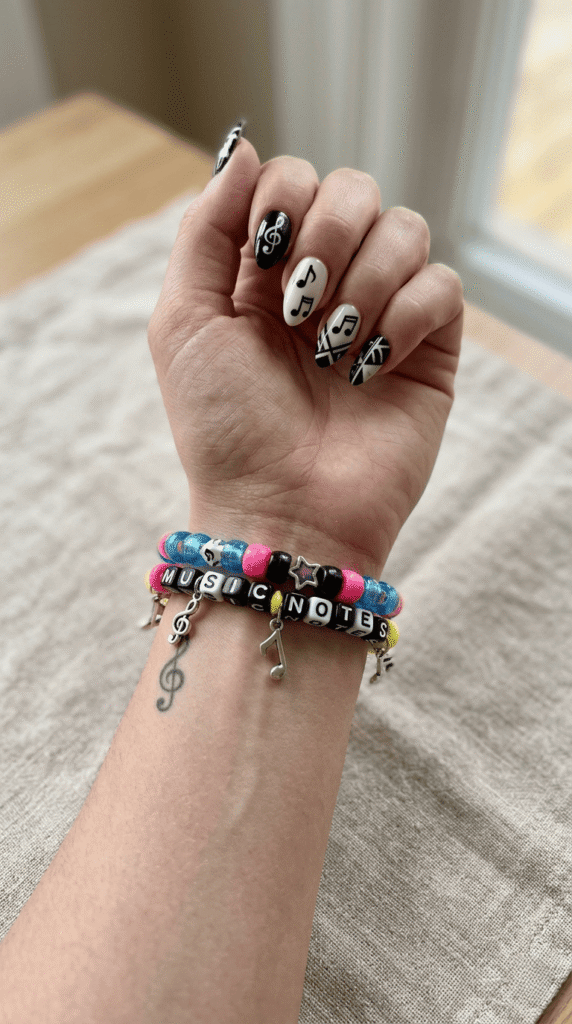
Music is the heartbeat of rave culture, so a bracelet featuring musical note beads feels right at home.
Music note-shaped beads exist in most craft stores, or you can string regular beads in a sequence that suggests a note silhouette on an X-base cuff.
A clean version: black music notes evenly spaced on a white base. A festival version: rainbow notes on a black base.
18. Alien Bracelet
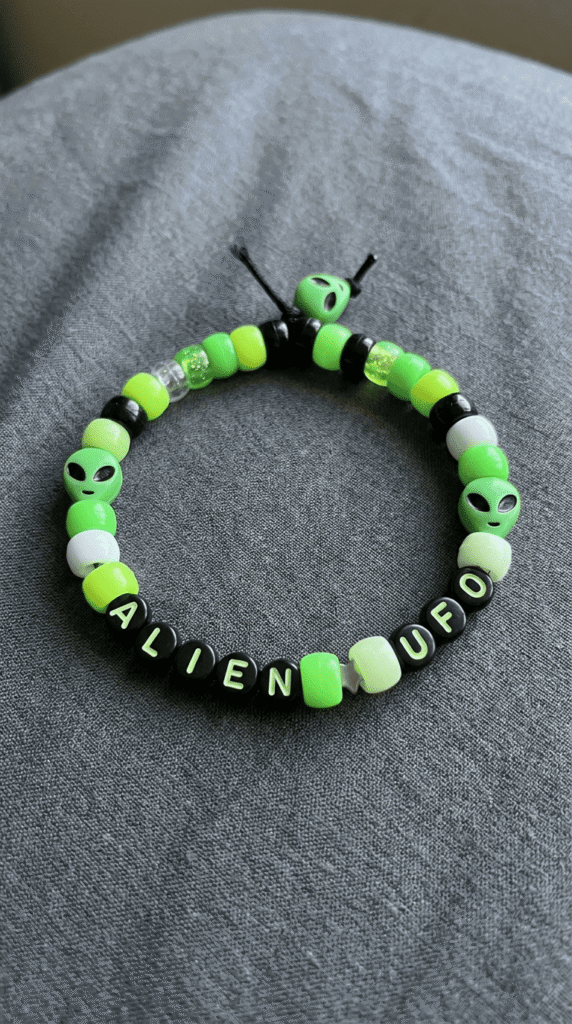
Big black oval eyes on a green face: the classic alien.
This reads spectacularly on an X-base cuff because the facial features have room to be recognizable.
But even on a single strand, green beads with two black bead “eyes” and a red bead “mouth” repeated around the bracelet gives you a fun, repeating alien pattern.
19. Cat Ears Bracelet
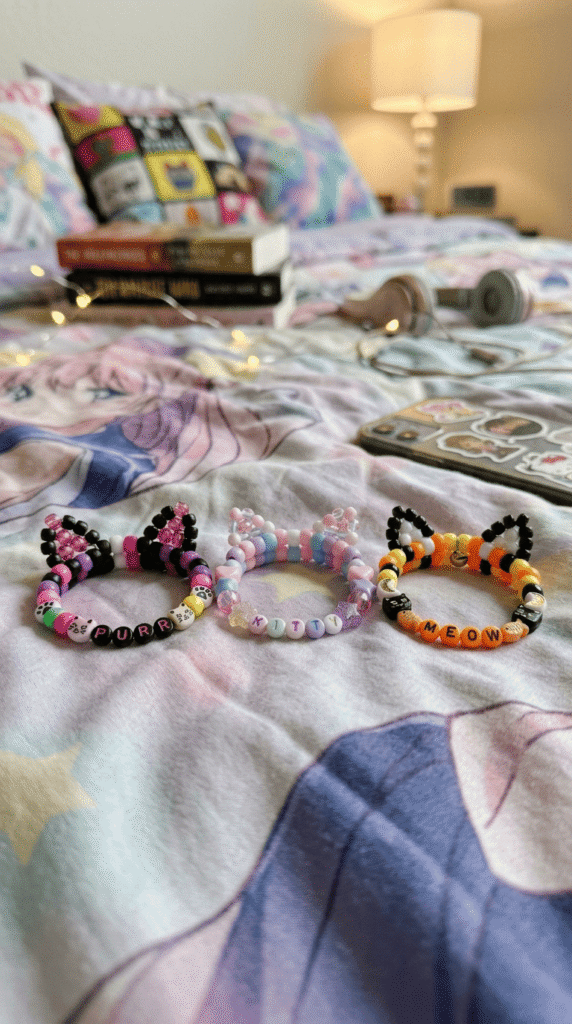
Cat ears kandi is having a long, well-deserved moment.
The most popular version uses a cuff technique with ears that actually protrude above the bracelet edge.
They’re made by building a small triangular section at the top of the cuff.
If that feels too advanced, a simpler alternative is a single-strand bracelet using cat-face-shaped pony beads, which are widely sold and adorable.
20. PLUR Hand Sign Bracelet
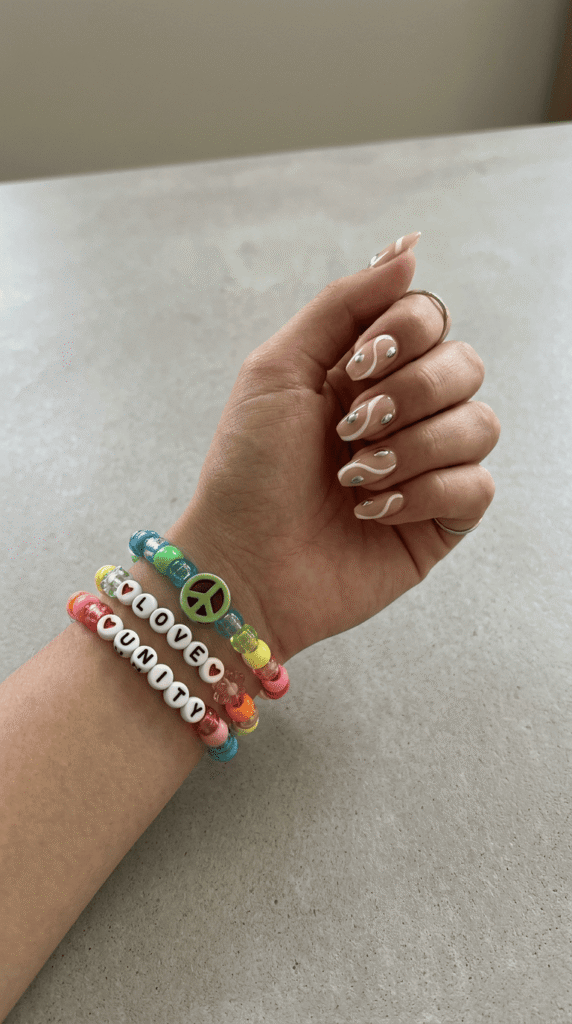
PLUR (Peace, Love, Unity, Respect) is the philosophy of rave culture, and the PLUR hand signal (a sequence of hand gestures used during kandi trades) is iconic.
Designing a bracelet around this theme is a meaningful way to represent the values of the community.
You can approach this in a few ways: spelling “PLUR” in letter beads, using a cuff with a pixel art peace sign, or combining peace sign, heart, and star-shaped beads to represent each element of PLUR.
The meaning is what matters; the execution can be as simple or elaborate as you like.
Frequently Asked Questions
What is the best bead size for small kandi?
Standard 9mm pony beads are the most common size for kandi and are what most tutorials assume you’re using. They’re easy to handle, widely available, and come in the widest color variety.
How long does it take to make a kandi bracelet?
A simple single-strand bracelet takes most beginners 10–20 minutes, including time to count out beads and tie off. Once you’re practiced, you can make a basic bracelet in under 10 minutes. An X-base cuff takes 45 minutes to several hours, depending on complexity.
Can kids make small kandi?
Absolutely. Kandi-making is a great craft for kids ages 6 and up. It builds fine motor skills and color pattern recognition. Adult supervision is recommended for younger children due to the small bead choking hazard.
What elastic cord is best for kandi?
Most experienced kandi-makers prefer 1mm clear elastic stretch cord. It’s thick enough to thread without a needle in most cases, strong enough to hold up to the wear and tear of being traded, and clear so it disappears among the beads.
How do you trade Kandi at a rave?
Kandi trading is done through the PLUR handshake, a sequence of gestures that represents Peace (touch fingertips together), Love (press palms together), Unity (interlace fingers), and Respect (slide the bracelet from your wrist to theirs as you bring your hands apart). It’s a physical and symbolic exchange.

Pingback: 12 Sunflower Beaded Jewelry Ideas You'll Want to Make Today