This post may contain affiliate links. As an Amazon Associate, We earn from qualifying purchases if you buy through our links at no extra cost to you. Please read our full disclosure here.
Store-bought Christmas decor adds up fast. And somehow it all ends up looking like the same stuff your neighbor bought.
I started making my own a few years ago, mostly because my budget told me to. Now it’s my favorite part of the season. Handmade pieces feel warmer, they smell better (hello, cinnamon), and people always ask where you got them.
So here are 25 DIY Christmas decor ideas you can actually finish. Most cost under $10. Most take one evening, a cup of hot chocolate, and a movie you’ve already seen ten times. You don’t need fancy tools or crafting skills. If you can use a hot glue gun, you’re ready.
Pick one, mix a few, or do the whole list. Your home, your rules.
Plan Your DIY Christmas Look
A little planning saves you from a pile of random crafts that don’t go together. Here’s what I do before I touch any glue.
- Start with a basic supply kit. Most projects on this list use the same few things: a hot glue gun, jute twine, a roll of ribbon, sharp scissors, and a little craft paint. Buy these once and you can make almost everything below.
- Shop cheap first. The dollar store, thrift shops, and your own recycling bin are full of free craft supplies. Glass jars, old frames, and leftover wrapping paper all show up on this list.
- Plan your time. Paper and garland projects take under 30 minutes. Baked projects like salt dough and dried oranges need a few hours in the oven, so start those on a weekend. And please make the messy ones, like faux snow, before you set the table.
- One more thing. Never leave candles near paper, cinnamon sticks, or dried fruit. Every project below that goes near a light uses flameless candles or battery lights. It’s safer, and honestly it looks just as pretty.
25 DIY Christmas Decor Ideas
1. Dried Orange Slice Garland
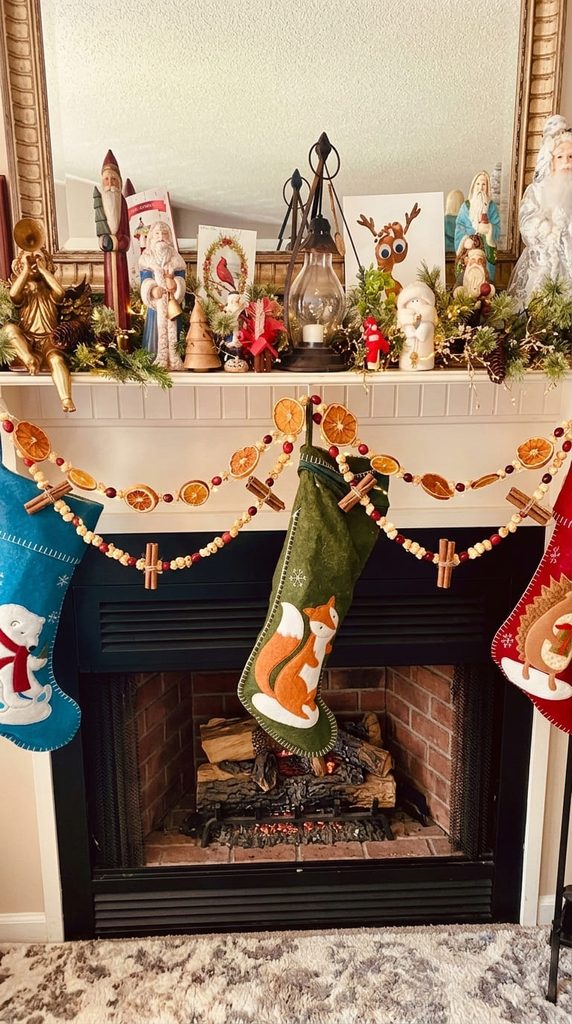
Okay, these look like they came from a fancy boutique. They cost me about $3. Slice oranges a quarter inch thick, pat them dry, and bake at 200°F for three to four hours, flipping once. Then thread them onto jute twine with a few cinnamon sticks. If you skip the pat-dry step, they turn brown instead of golden.
2. Cinnamon Stick Candle Holders
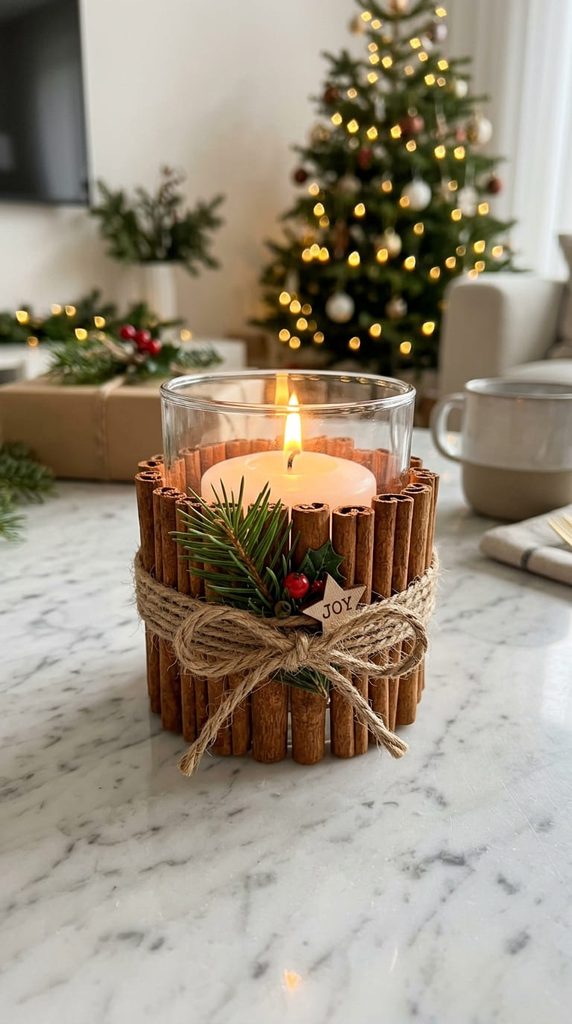
Wrap cinnamon sticks around a plain glass holder, tie it with twine, and you’re done. It looks cozy and your whole room smells like Christmas. Use flameless LED tealights inside, since real flames and dry cinnamon do not mix.
3. Mason Jar Snow Globes
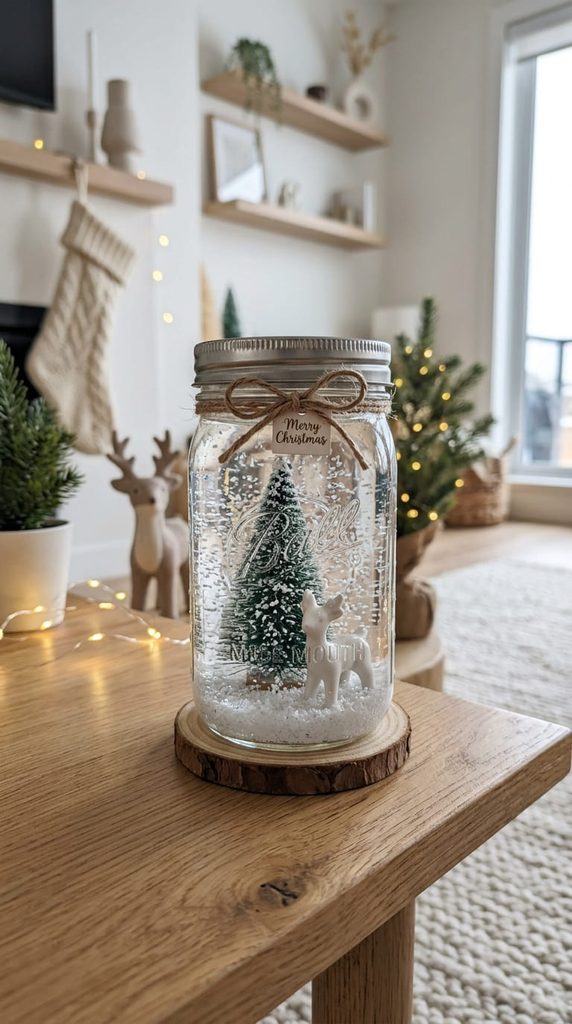
Glue a small plastic tree or figurine to the inside of the lid, add a spoonful of fake snow, then fill the jar with water and a drop of glycerin. Screw the lid on tight and flip it over. Use waterproof glue, because regular craft glue lets go after a day or two and your little tree will float away.
4. Yarn Pom Pom Garland
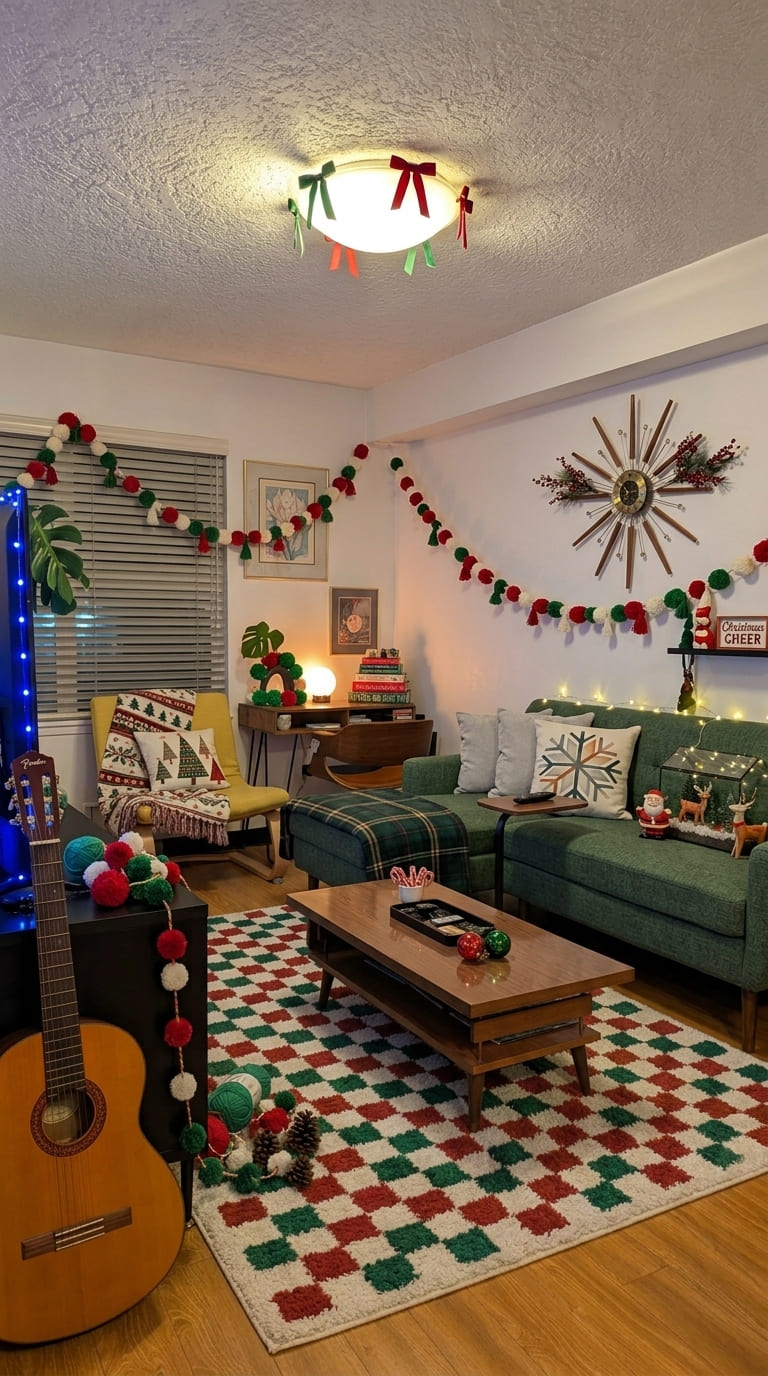
This is the easiest project here, and a great one for kids. Wrap yarn around a fork or a pom pom maker, tie it off, and snip. String a dozen or so on twine and drape the garland over a bookshelf or window.
5. Paper Snowflake Window Display
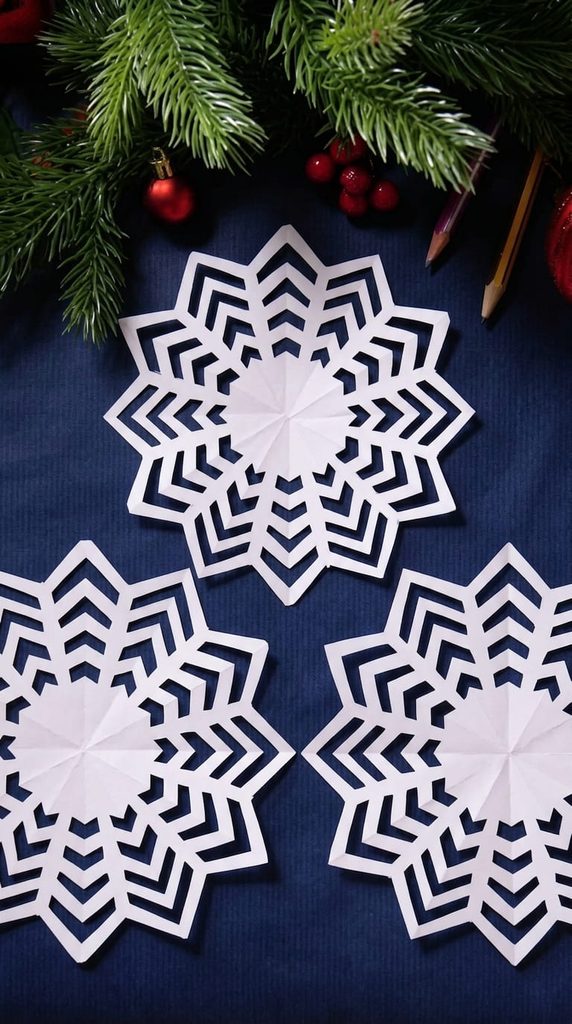
It’s basically free, and it still looks magical when the light hits it. Fold thin printer paper, cut out little shapes, and unfold. Thinner paper gives you sharper, lacier cuts. Tape the snowflakes at different heights so the window feels full.
6. Salt Dough Ornaments
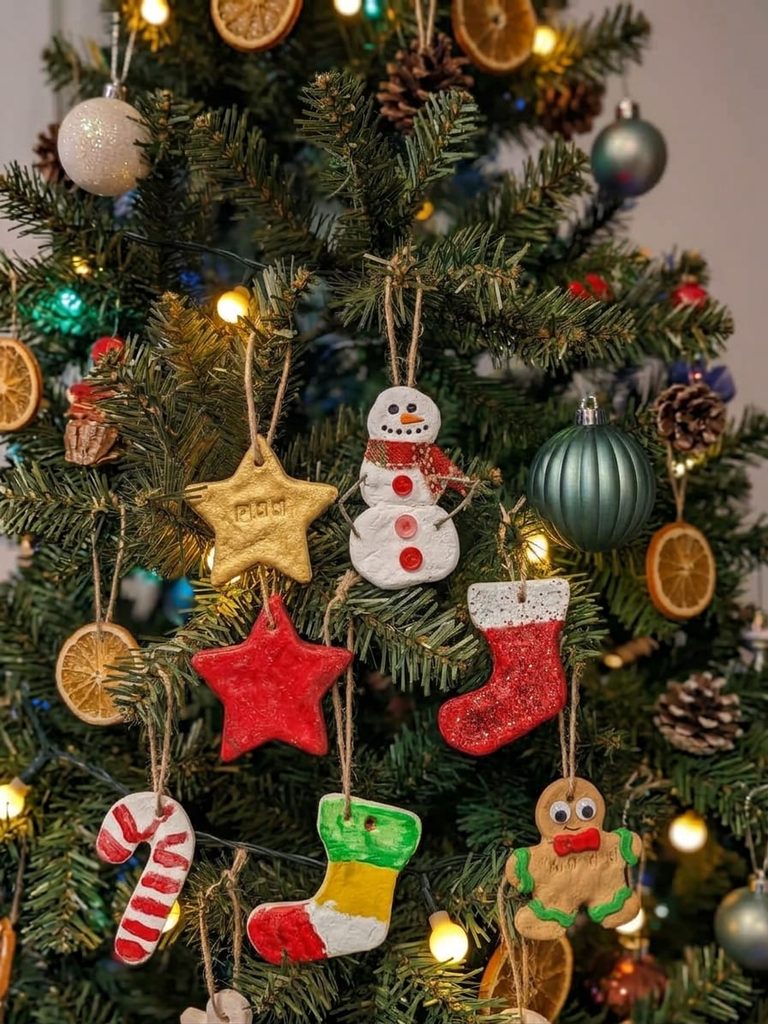
Mix one cup of flour, half a cup of salt, and half a cup of water. Roll the dough out, press with cookie cutters, poke a hole for the string, and bake at 250°F for two to three hours. Seal them with clear spray once they cool, and they’ll last for years.
RELATED: Christmas Mantel Ideas
7. Dollar Store Candlestick Hacks
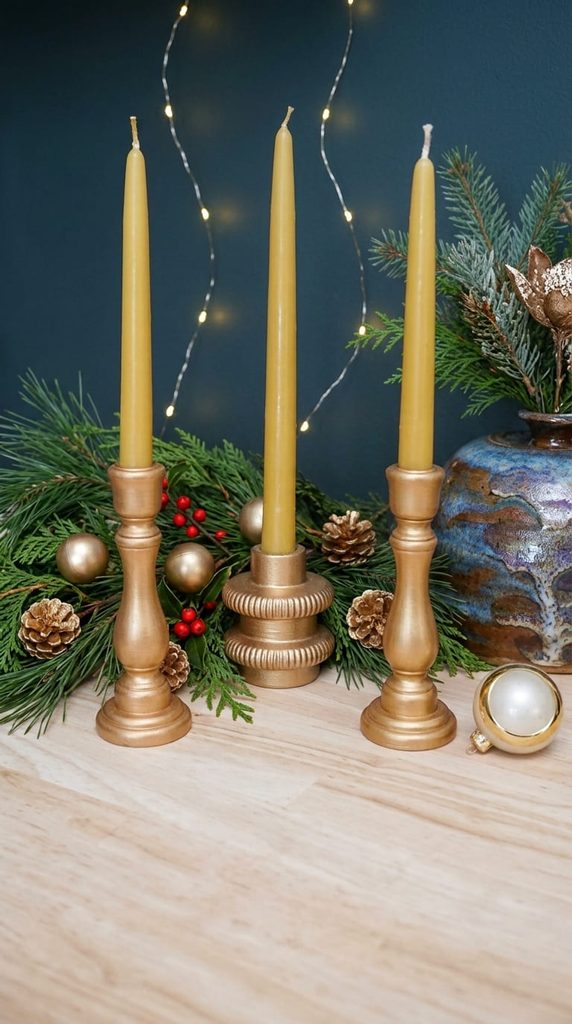
Grab cheap glass or plastic candlesticks and give them a coat of gold or matte black spray paint. Suddenly they look like brass antiques. Do two thin coats instead of one thick one, or you’ll end up with drips.
8. Popcorn and Cranberry Garland
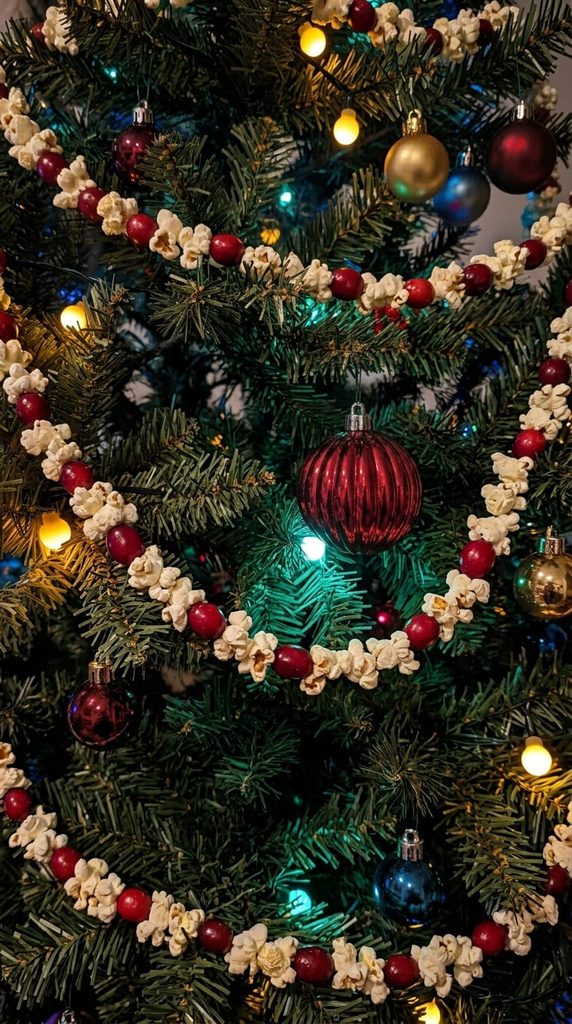
Yes, the old-school one. And yes, it’s still adorable. Use day-old popcorn, since fresh popcorn is too soft and crumbles on the needle. Alternate popcorn and fresh cranberries on strong thread, and don’t make it too long unless you enjoy untangling.
9. Paper Cone Christmas Trees
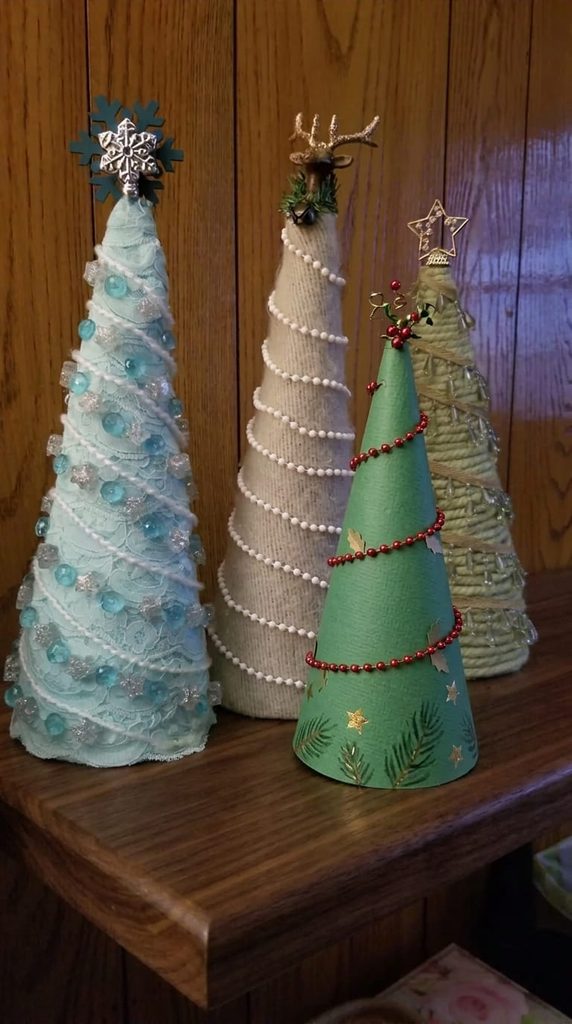
Roll cardstock into a cone, glue the seam, and trim the bottom flat so it stands up. Decorate with tiny pom poms, glitter, or paper stars. Make a set of three or four in different heights and they look great on a shelf or the center of your table.
10. Velvet Ribbon Bow Tree Topper
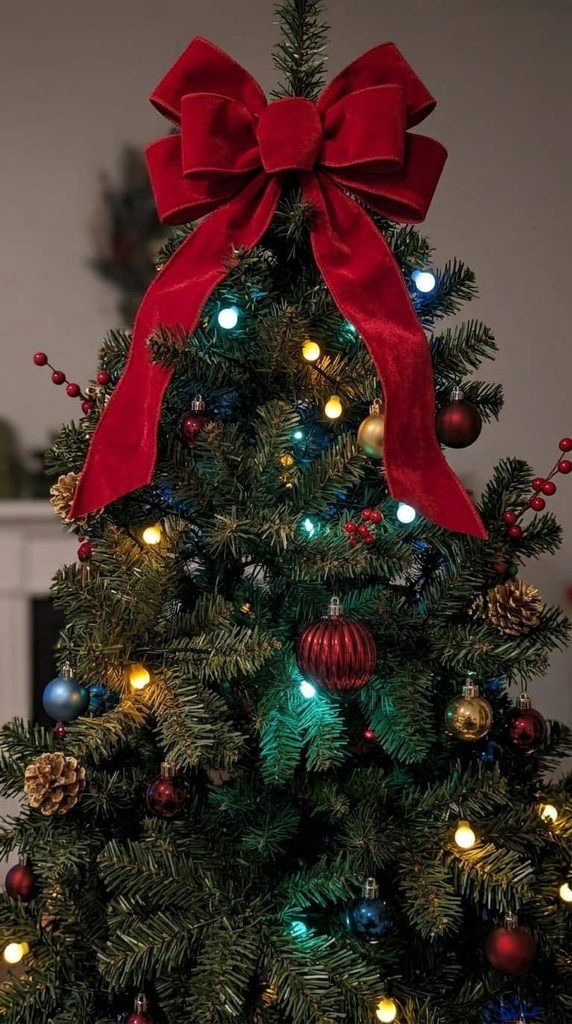
Bows are everywhere right now, and a big one makes a pretty tree topper. Use wired velvet ribbon, because regular ribbon goes floppy. Make a few loops, pinch the middle with floral wire, and tuck the tails into the top branches.
11. Painted Pinecone Trees
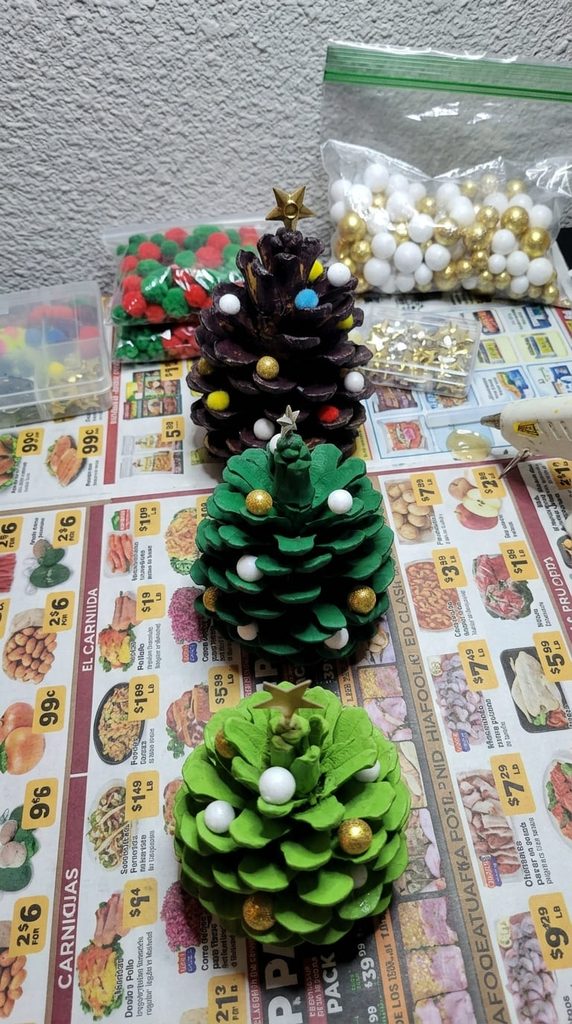
Collect pinecones from outside, then bake them at 200°F for 30 minutes to get rid of bugs and sap. Paint the tips white or gold with acrylic paint and let them dry. Group them in a bowl or glue a few onto a small wood slice for a mini forest.
12. No-Sew Felt Stockings
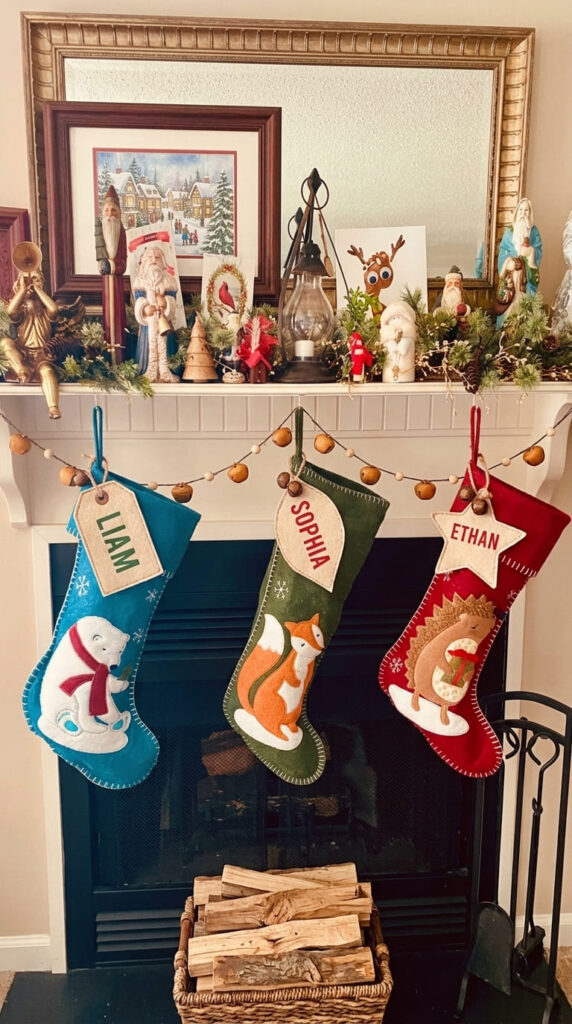
You don’t need a sewing machine for these. Trace a stocking shape on felt sheets, cut two, and glue the edges with fabric glue. Let them dry flat overnight before you hang anything heavy in them.
13. Glitter Snowflake Tree Topper
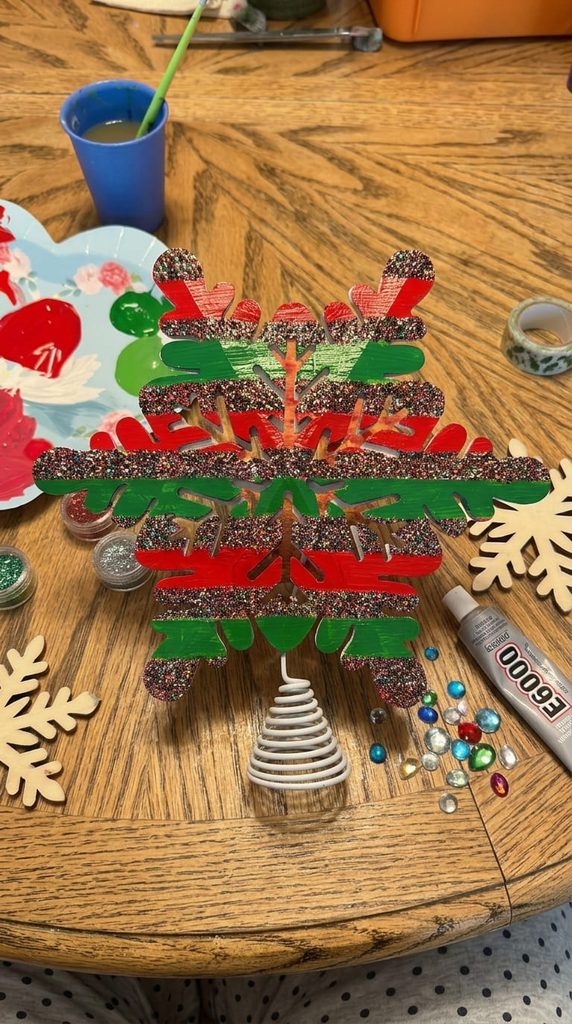
Start with a wooden or chipboard snowflake cutout and paint it in bold red and green stripes. Brush glue between the stripes and sprinkle on chunky glitter for that sparkly, candy-cane look. Let each paint layer dry fully before adding glitter, or the colors turn muddy. Then stick it on a coiled wire base so it sits right on top of your tree.
RELATED: Front Porch Christmas Decor Ideas
14. Envelope Advent Calendar
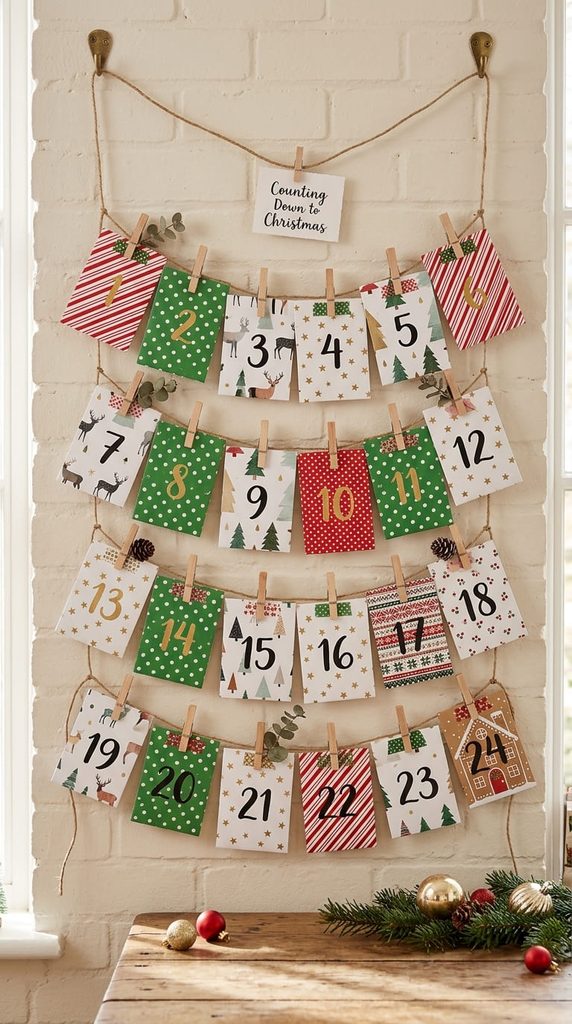
I’m obsessed with this one because you can reuse it every single year. Clip 24 small kraft envelopes onto twine, number them, and slip in a candy, a note, or a little activity. Hang it on a wall and watch everyone check it every morning.
15. Wooden Bead Garland
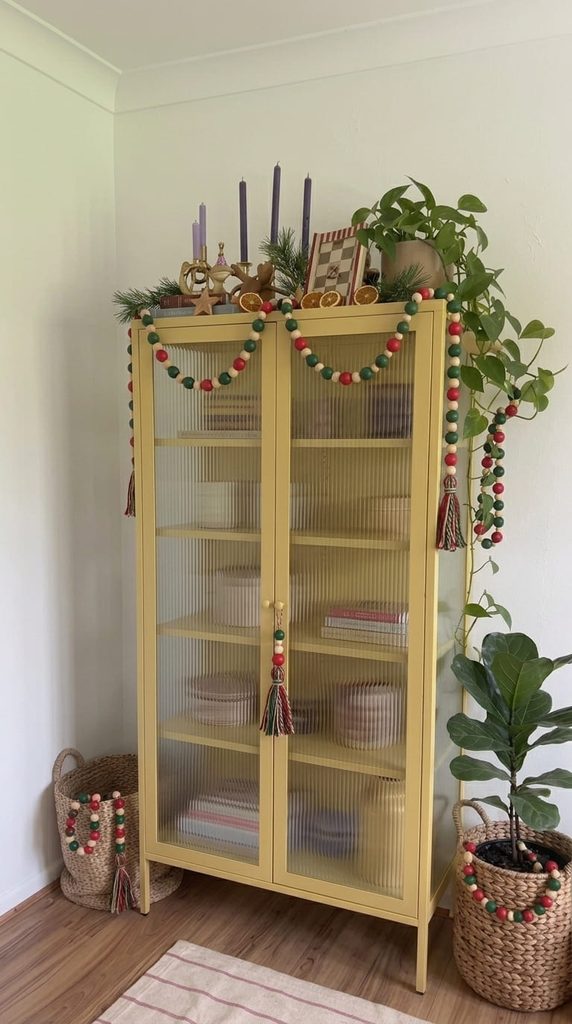
This one is simple, cheap, and looks very Pinterest. Thread wooden beads onto string, add a tassel at each end, and drape it on the tree or across a shelf. Mix in a few painted beads to match your color palette.
16. Ornament-Filled Glass Vase
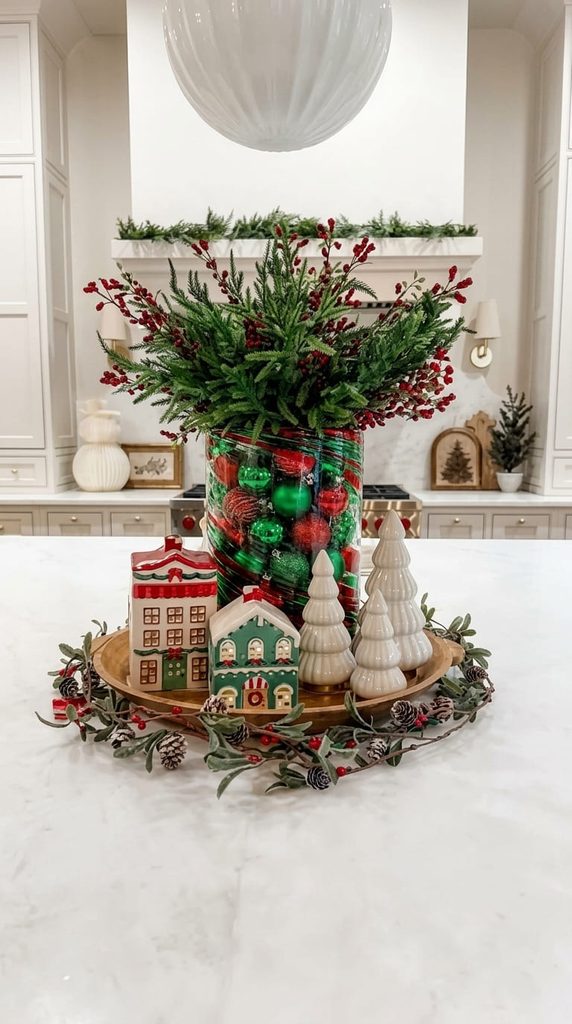
Got a box of mismatched or chipped ornaments? Put them to work. Fill a glass cylinder vase with ornaments in two or three colors, and you have a centerpiece in about two minutes. Put the prettiest ones near the front, and the damaged ones on the back side.
17. Framed Wrapping Paper Art
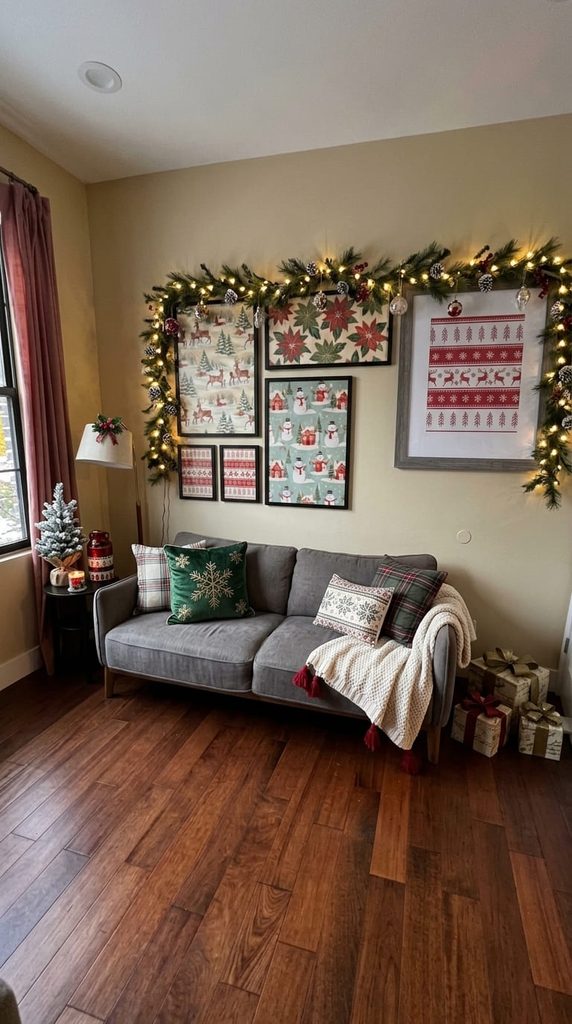
Pick a pretty wrapping paper pattern, cut it to size, and pop it into a cheap frame. Hang a trio of them above a console or beside the tree. It’s about $5 per frame and it looks like art you bought on purpose.
RELATED: Wall Decor Ideas
18. Faux Snow Candle Jars
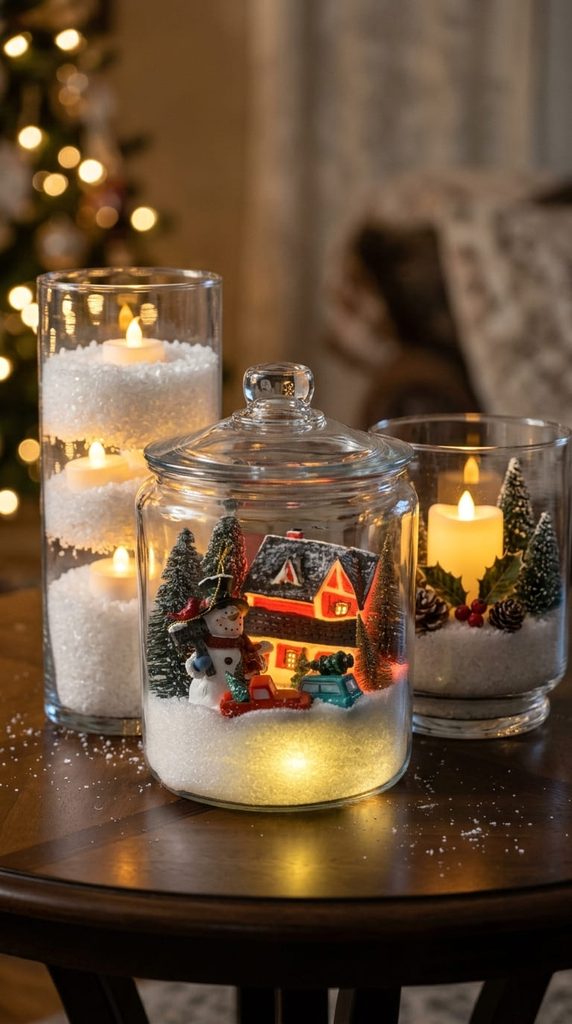
Brush a thin layer of white glue on the outside of a jar, then roll it in Epsom salt. It sparkles like real frost. Put a flameless candle inside and keep these away from water, since the salt melts when it gets wet.
19. Kraft Paper Table Runner with Stamped Trees
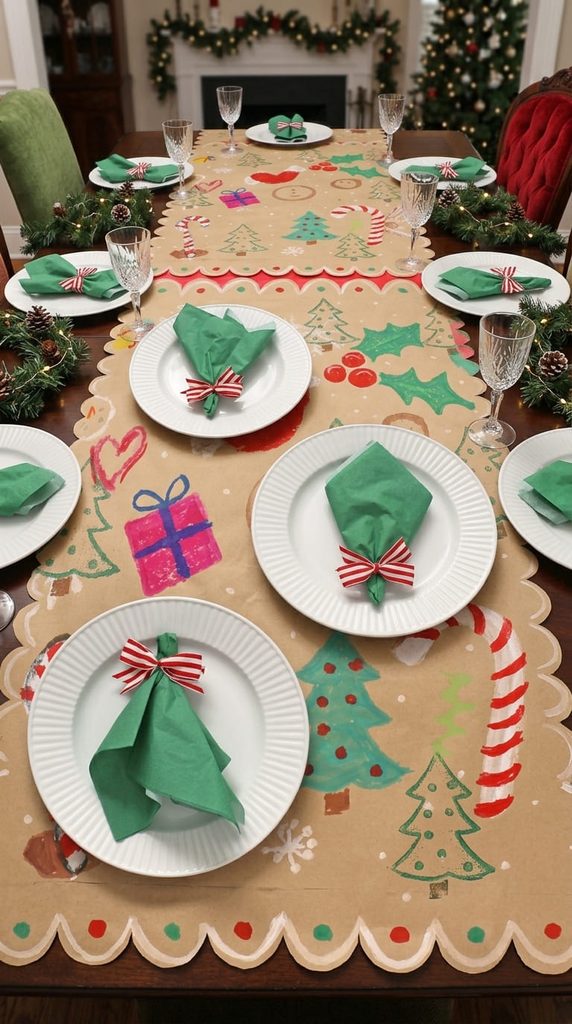
Roll kraft paper down the table, then stamp little trees all over it with a cut potato and green paint. Yes, a potato. It looks charming, it costs almost nothing, and the kids will happily do the stamping while you cook. When dinner is over, you just roll it up and toss it.
20. Twig Star Ornaments
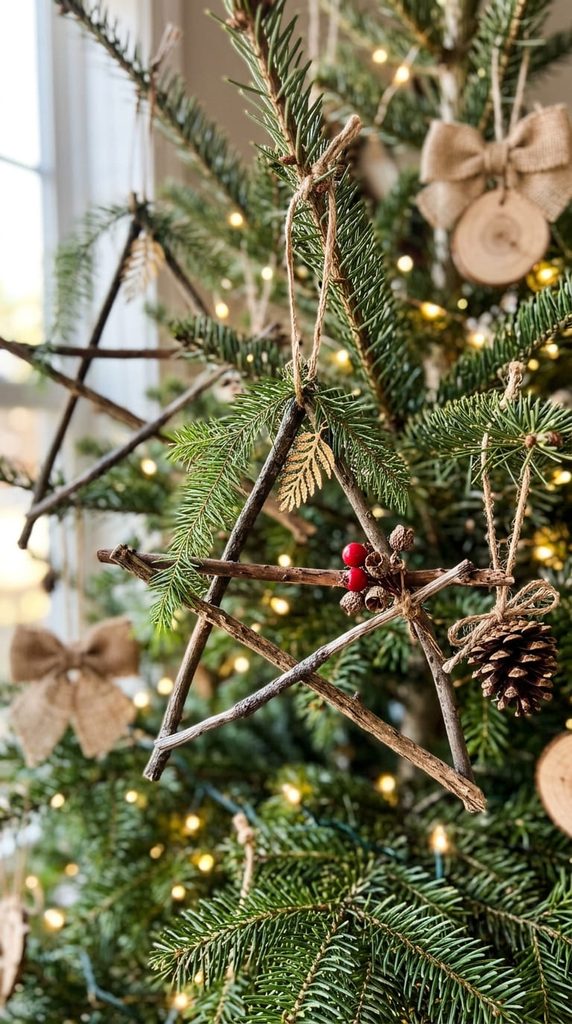
Gather five sticks of the same length from your yard. Glue them into a star shape with a mini glue gun, then tie a loop of twine on top. Snap the twigs to size first so the points line up. These look rustic and a little expensive on a simple tree.
21. Mini Christmas Village Corner
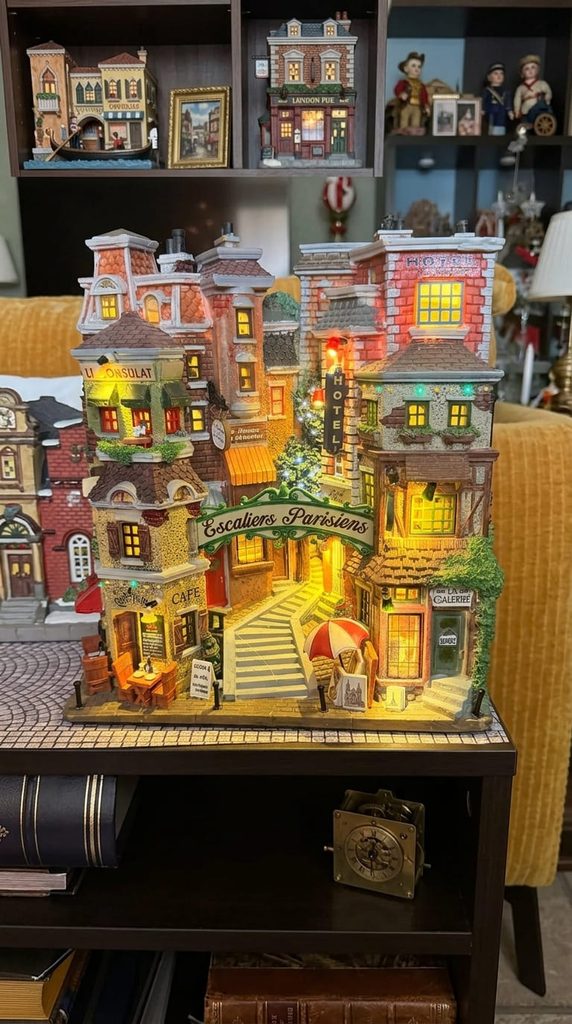
A lit village on a side table makes a whole corner feel like a snow globe. Build a cobblestone street with a strip of peel and stick mosaic tile as the base, then add a bit of faux snow around the edges. Tuck the cords behind the buildings and use one power strip, so you only have one plug to worry about.
22. Santa Boot Vase Centerpiece
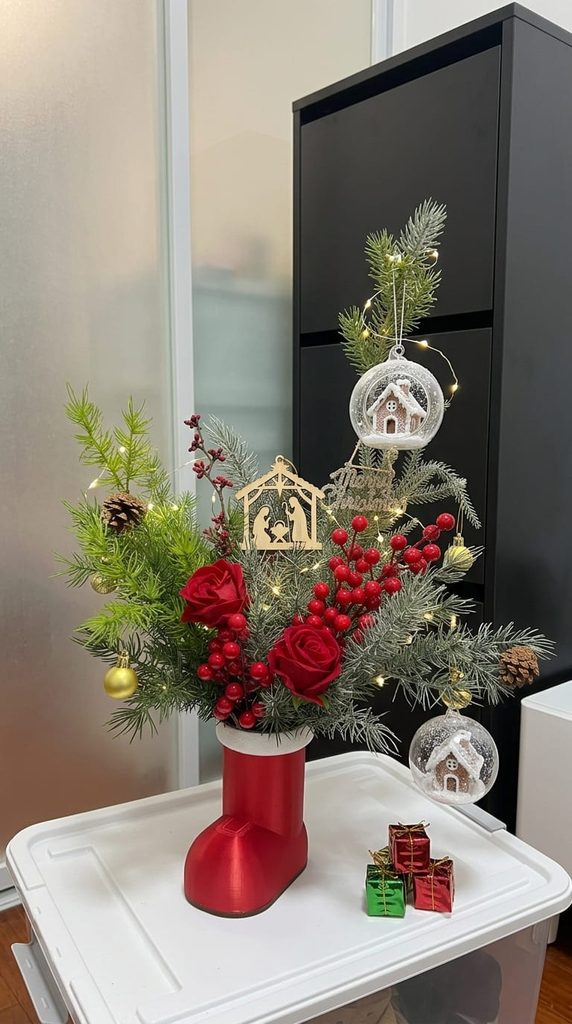
Fill a red Santa boot vase with faux pine stems, a couple of red roses, and a few red berry picks. Poke in mini gold ornaments and a glitter star pick to finish it. Press a block of floral foam into the bottom first, or the heavy stems will tip the whole thing over.
23. Beaded Ornament with a Charm Inside
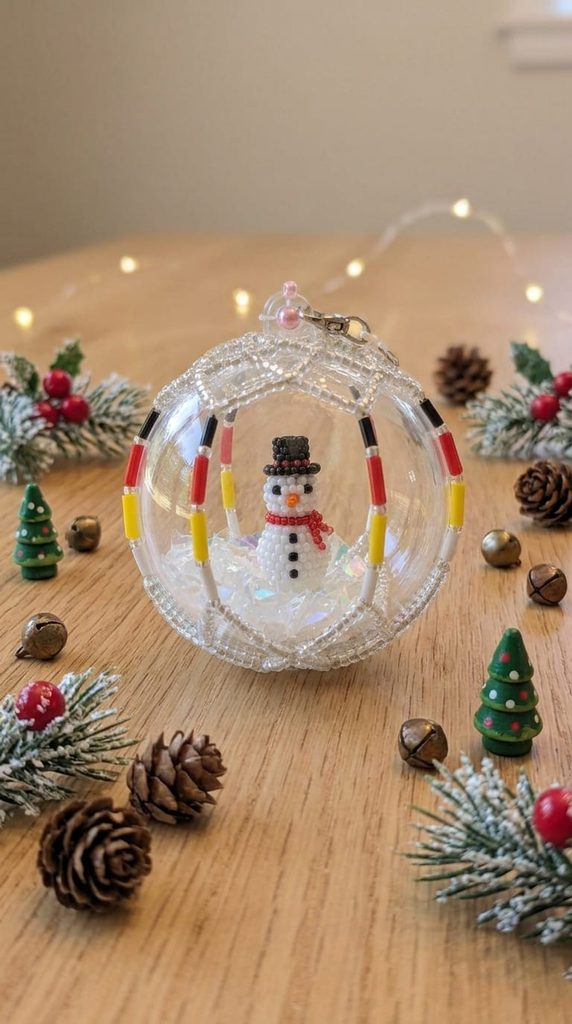
Drop fake snow and a small charm into a clear fillable ornament, then weave a net of seed beads over the outside. Choose colors that mean something to you, and the ornament becomes a keepsake instead of just decor. Use strong beading thread and knot often, because one snag can unravel a whole row.
24. Slim Tinsel Tree for Small Spaces
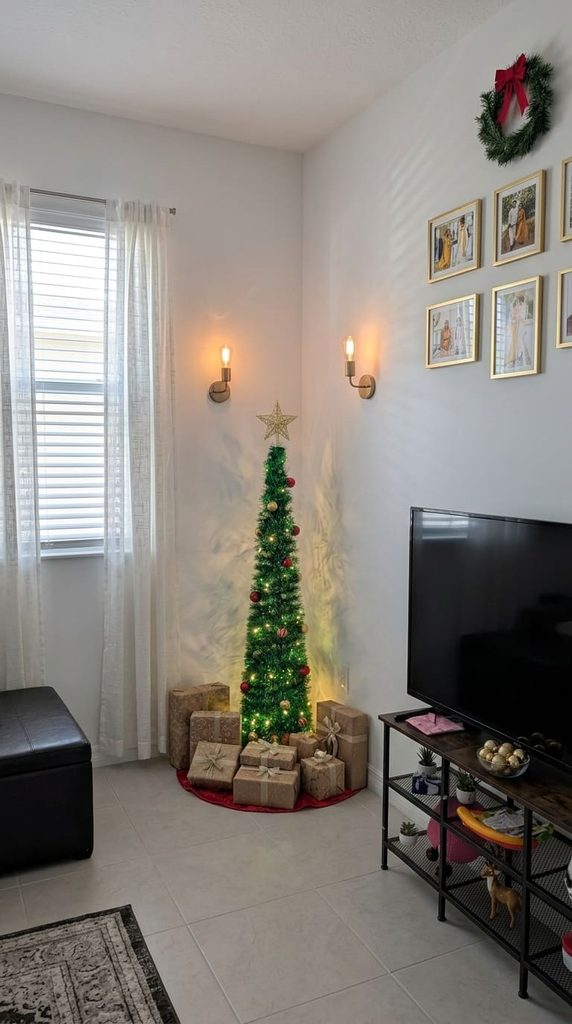
No room for a full tree? A pencil tinsel tree tucked into a corner gives you the whole Christmas feeling in a few square feet. Add warm white lights first, then a handful of red and gold ornaments and a star on top. For a $3 DIY tree skirt, cut a red felt circle and snip a slit to the center.
25. Beaded Crystal Snowflake Ornaments
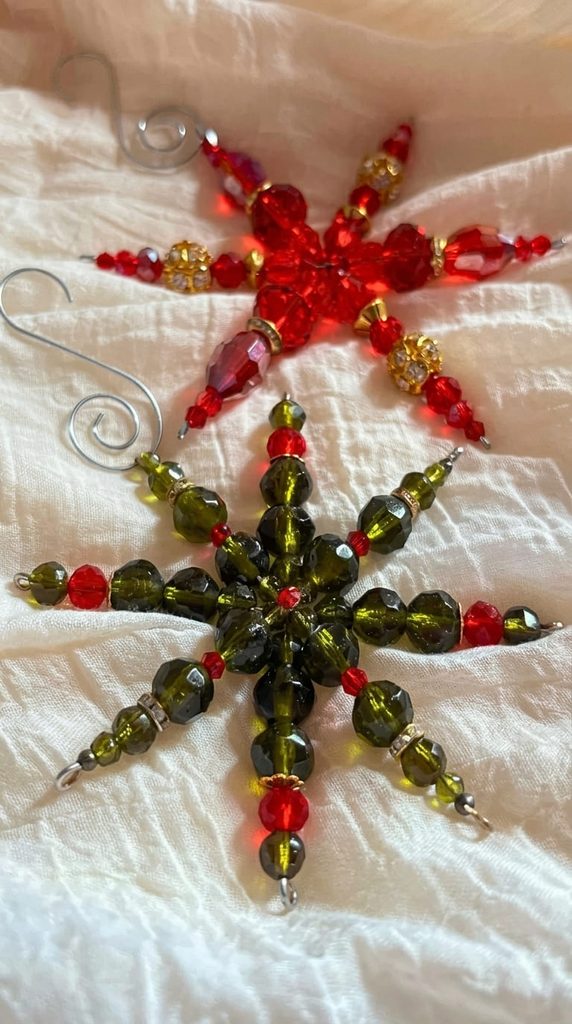
Thread faceted glass beads onto six lengths of craft wire, twist them together in the center, and fan out the arms. Red and gold looks classic, while olive green gives a vintage feel. Bend the tip of each wire end with pliers, so the beads can’t slide off, then hang them from S-hooks.
Frequently Asked Questions
What are some easy DIY Christmas decorations for beginners?
Paper snowflakes, yarn pom pom garlands, and dried orange slices are the easiest places to start. They use cheap supplies, need no special skills, and are hard to mess up. Most take under an hour, so you can see results fast and build confidence for bigger projects.
How can I decorate for Christmas on a budget?
Start with what you already have, like glass jars, old frames, and leftover wrapping paper. Then add cheap supplies from the dollar store, such as candlesticks, ribbon, and felt. Pick two or three colors and stick to them. A small number of handmade pieces in matching colors looks richer than a lot of random decor.
What are the best DIY Christmas decorations to make with kids?
Paper snowflakes, pom pom garlands, salt dough ornaments, and potato-stamped table runners are all kid-friendly. They’re mostly safe, mess-friendly, and the results look cute even when they’re not perfect. Keep the hot glue gun for adults, and let the kids handle painting, stamping, and decorating.
When should I start making DIY Christmas decorations?
Early to mid November is a good time to start, so you’re not rushing in December. Projects that need baking or drying time, like salt dough ornaments and orange slices, are best done first. Save the quick paper and ribbon projects for the week you put up your tree.
How do I store handmade Christmas decorations so they last?
Let everything dry fully, then wrap fragile pieces in tissue paper. Store them in a sturdy box in a cool, dry spot, not a damp garage or hot attic. Salt dough and dried oranges will last longer if you seal them first and keep them away from moisture.
You don’t have to make all 25. Pick the one that feels easiest, grab your supplies, and start there. Candles, ribbon, or a few oranges in the oven is all it takes to make the house feel like Christmas.
Add more projects as you go. Honestly, I usually do.