This post may contain affiliate links. As an Amazon Associate, We earn from qualifying purchases if you buy through our links at no extra cost to you. Please read our full disclosure here.
Coil pots are having a real moment right now. No wheel, no fancy studio, no years of practice needed. Just clay, your hands, and a little patience.
If your only memory of coil pots is a lumpy ashtray from third grade art class, get ready to have your mind changed. The ones people are making now look like something you’d pay $40 for at a boutique home store. Not something built by rolling clay into snakes.
I’ve made more coil pots than I can count at this point. Some gorgeous, some that collapsed halfway through and became “abstract art.” There’s something weirdly calming about the repetition too, rolling coil after coil, that makes this feel more like a stress reliever than a craft project some days.
Coil Pot Ideas
Here are 15 coil pot ideas worth trying, from beginner-friendly shapes to ones that look way more advanced than they actually are.
1. Classic Exposed Coil Texture
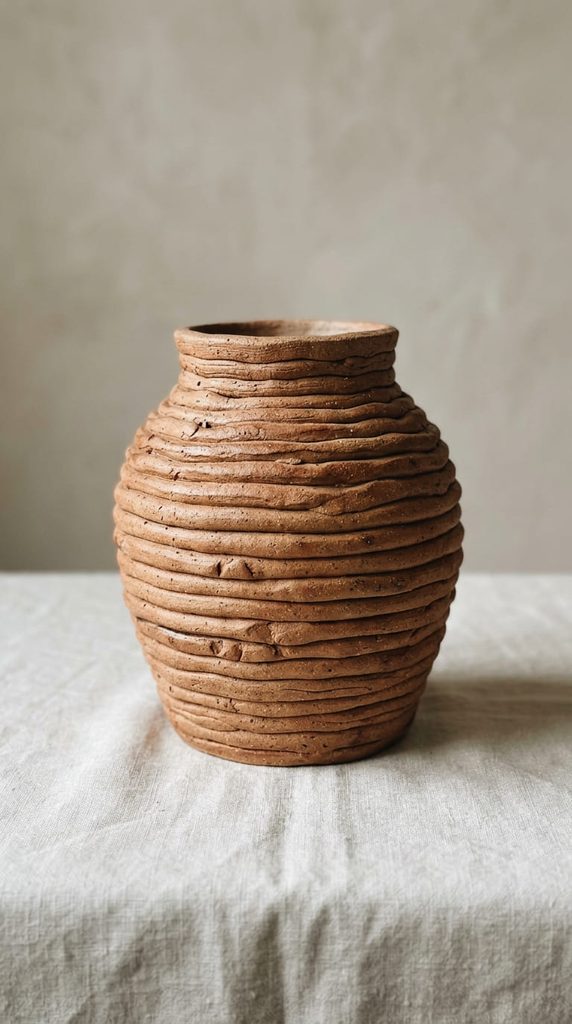
This is the one most people picture when they hear “coil pot,” and for good reason. You leave the coils visible instead of smoothing them down, so the whole pot has this ridged, almost basket-woven look. I left mine unglazed on the outside and it genuinely looks like something from a pricey ceramics shop.
The texture does all the work for you here. No smoothing technique to master, no perfect seams required. Honestly the one I’d hand to a total beginner, since the little imperfections just add to the charm instead of ruining the piece.
2. Smoothed Blended Coil Pot
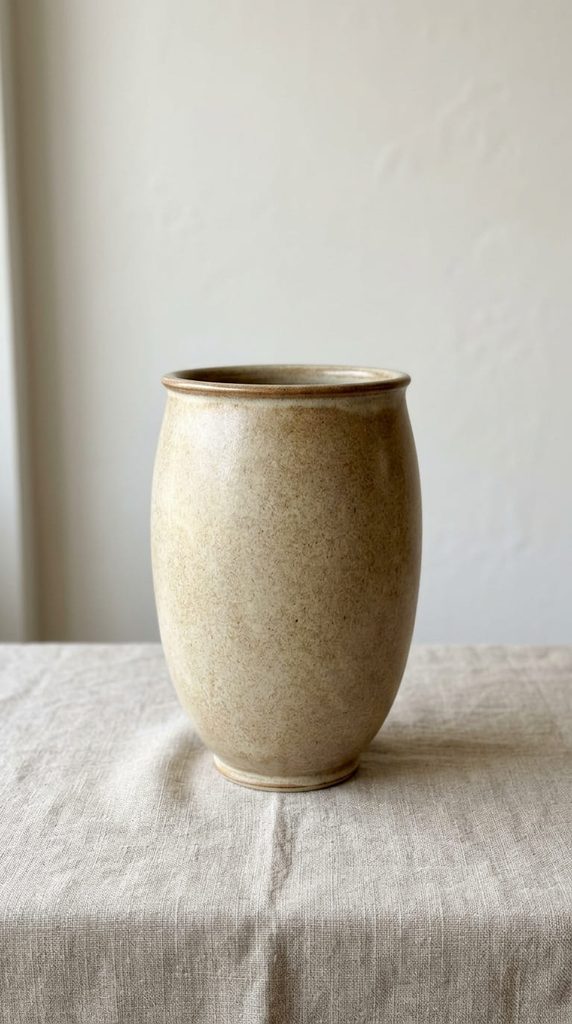
On the opposite end, you can blend every seam until the pot looks like it was thrown on a wheel. Takes more time (I spent almost twenty minutes just smoothing one small pot), but the payoff is a clean, minimal shape that fits into pretty much any decor style.
Use a rib tool or even the back of a spoon to blend as you go, not after the fact. A good pick if you love the coiling process itself but want the finished look a little more understated, especially in a modern or minimalist space where texture-heavy pieces can feel out of place.
3. Two-Tone Clay Coil Pot
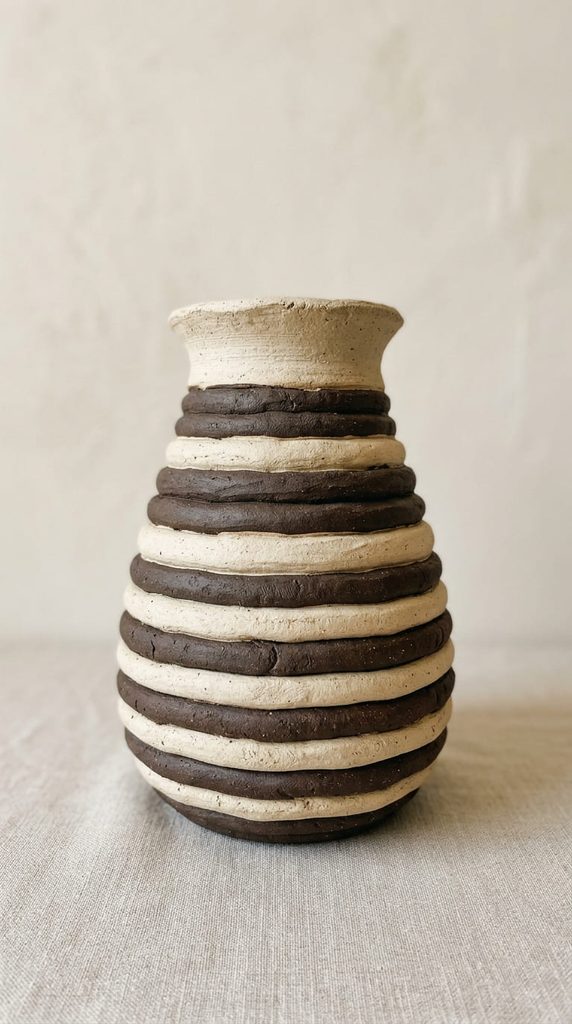
Alternating light and dark clay as you stack your coils gives you a striped effect with zero painting required. I used a plain white clay with a terracotta and the contrast came out way better than I expected.
Play with the spacing. Even, tight stripes read more modern. Random, uneven bands feel a little more relaxed, more handmade. This one photographs beautifully too, for what it’s worth, if you’re planning on sharing it anywhere. Just make sure both clays are roughly the same moisture level before joining them, or one side dries faster and pulls away from the other.
4. Chunky Coil Planter
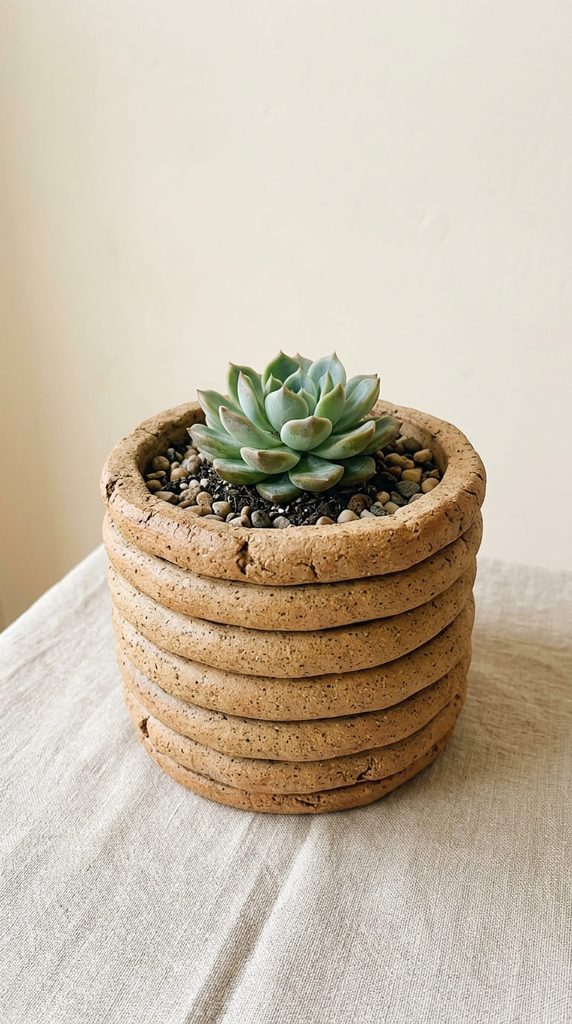
Roll your coils extra thick for a sturdier, more substantial planter. This is the one I’d actually trust with a real plant, since thinner walls can feel fragile once they’re loaded with soil and water. A small succulent or cactus suits the size perfectly.
One thing to remember: poke a drainage hole in the base before it dries if you want to plant directly into it. Otherwise just keep the plant in its plastic nursery pot and use this as a decorative cover instead.
RELATED: Pottery Painting Ideas
5. Thin Delicate Coil Vase
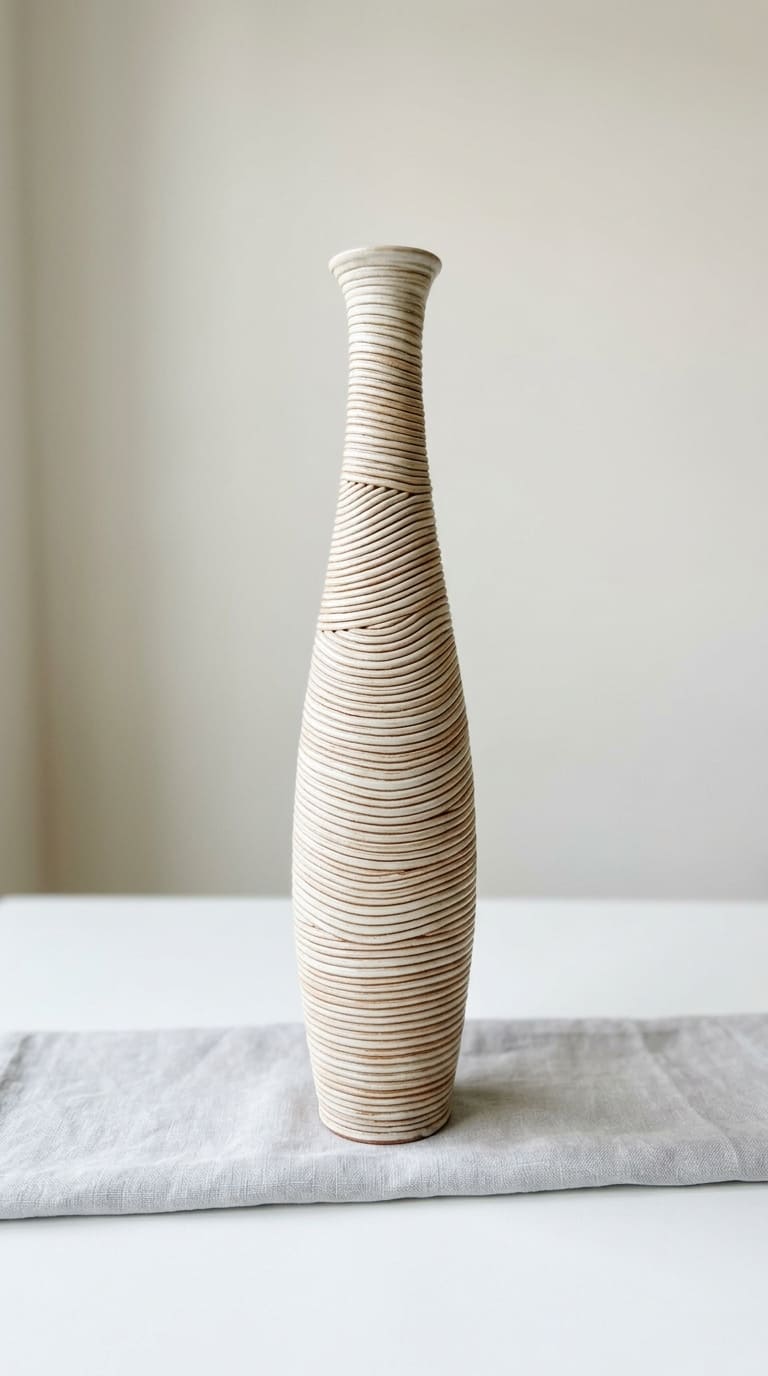
If chunky isn’t your thing, go the opposite direction. Thin, delicate coils built into a taller, narrower vase. It’s trickier to keep from wobbling, so work slowly and let the bottom layers firm up before adding height.
I usually build the bottom half one day, let it firm up overnight, then add the rest the next day so it doesn’t sag under its own weight. A little annoying, honestly, but worth it for how elegant the final shape looks.
6. Spiral Base Coil Pot
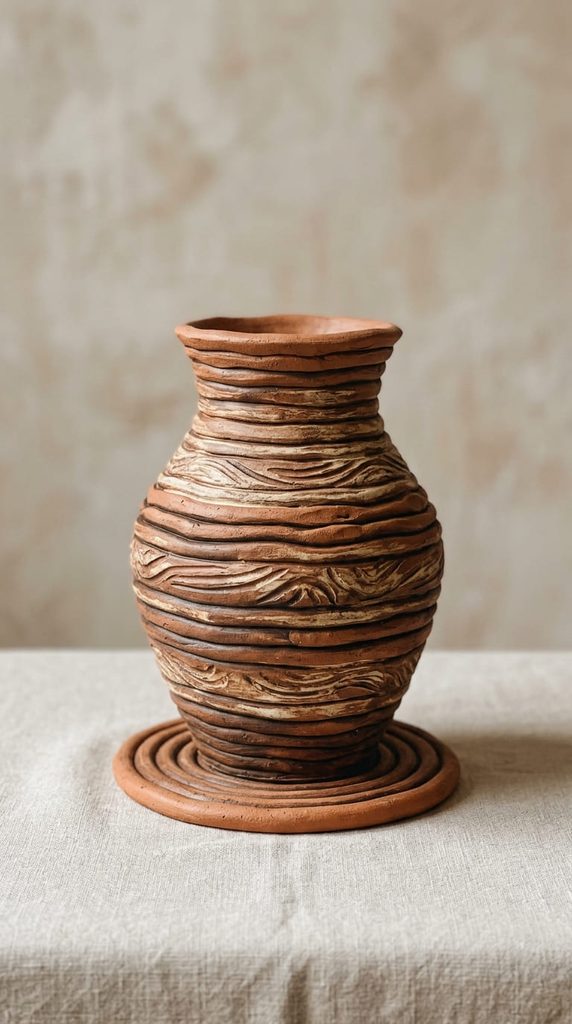
Instead of a flat disc base, coil the very bottom into a tight spiral so the pattern shows from underneath too. Small detail. Makes the whole piece feel more intentional, more finished. And genuinely kind of satisfying to make, since you can watch the spiral grow with each pass.
This works especially well if you’re planning to display the piece somewhere it might get picked up and turned over, like a coffee table pot people tend to handle out of curiosity.
7. Organic Wavy Rim Coil Pot
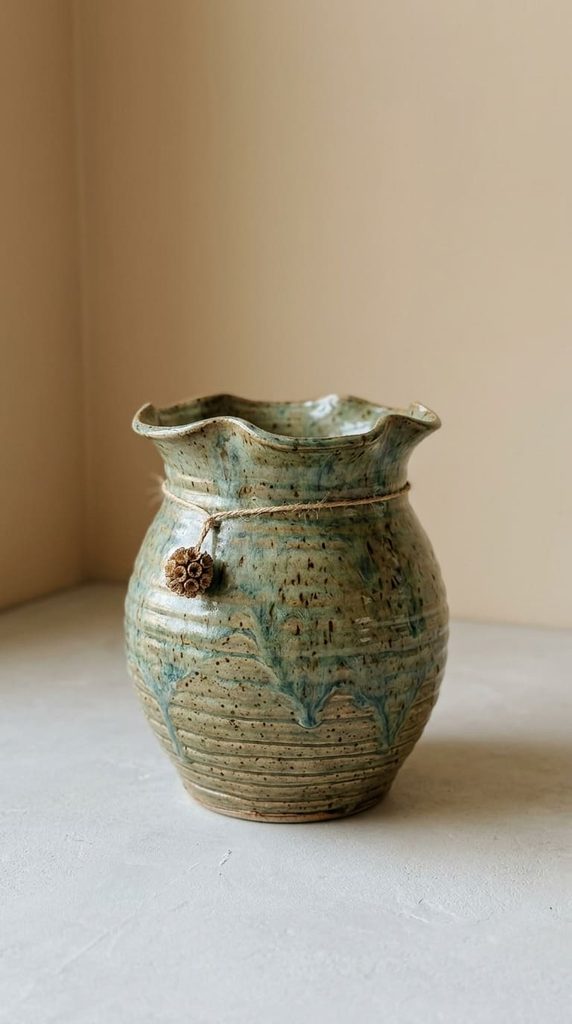
Skip the perfectly flat, trimmed top edge. Leave it a little wavy, a little uneven. Gives the pot a more organic, handmade feel instead of looking too polished.
Also a great trick if your rim isn’t coming out even anyway (mine rarely does). Turns what would be a mistake into a deliberate style choice, and nobody has to know the difference.
8. Coil Pot with Carved Details
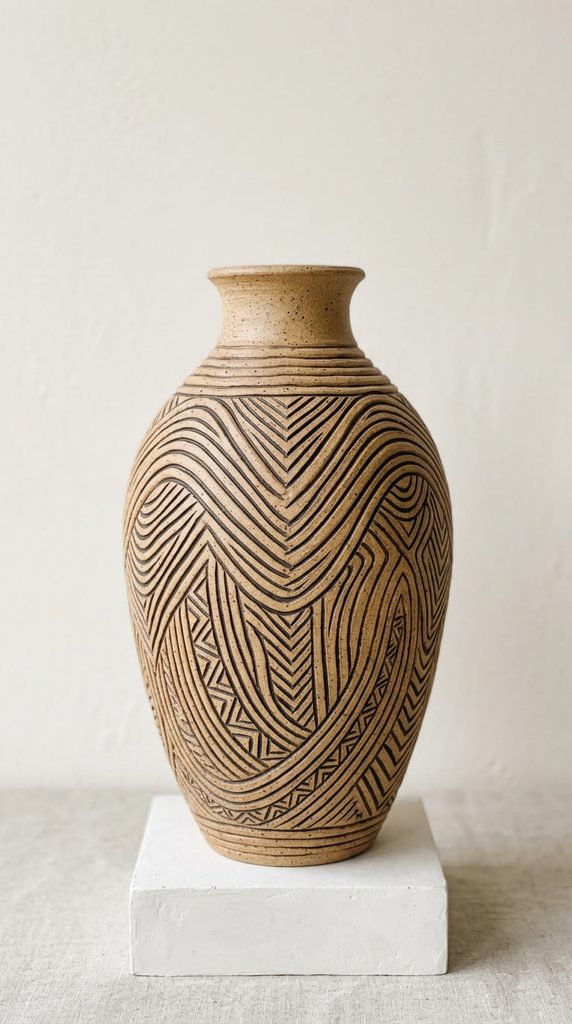
Once your coils are smoothed, grab a small carving tool, or even a toothpick, and etch a simple pattern into the surface before it fully dries. Lines, dots, tiny leaf shapes. Anything works. I did a row of little dashes around mine and it took the whole thing from “fine” to actually kind of impressive.
Timing matters, though. Carve while the clay is leather-hard: firm, but not fully dry. Otherwise your lines crumble at the edges instead of staying crisp.
9. Pastel Glazed Coil Pot
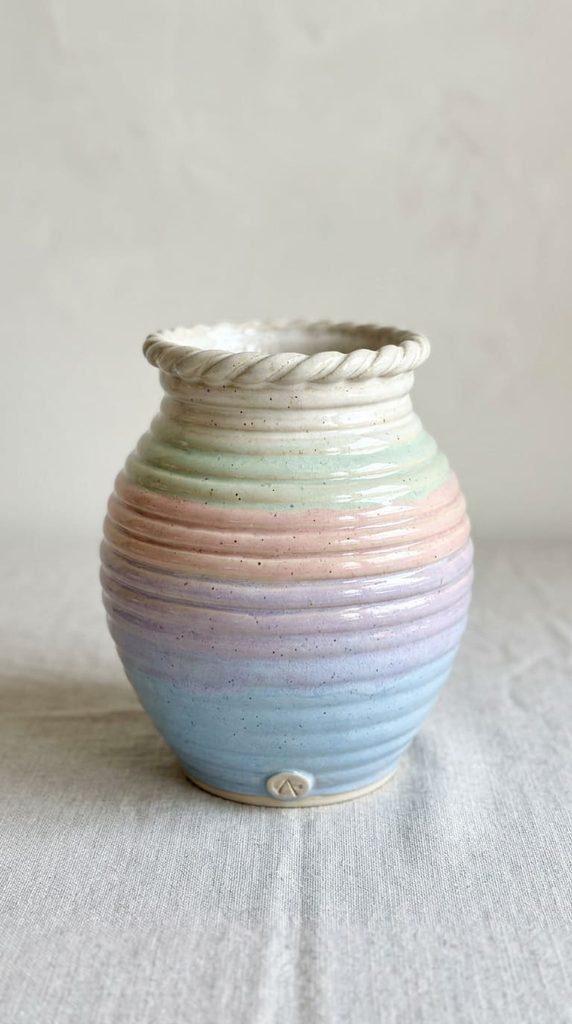
If you have access to a kiln, a soft pastel glaze on a simple coil shape looks incredibly clean and modern. Sage green, dusty pink, pale blue, all popular right now for a reason. No kiln at home? Most local pottery studios will fire pieces for a small fee. That’s exactly what I do.
RELATED: Creative Storage Organizer Bins Ideas
10. Speckled Stoneware Coil Pot
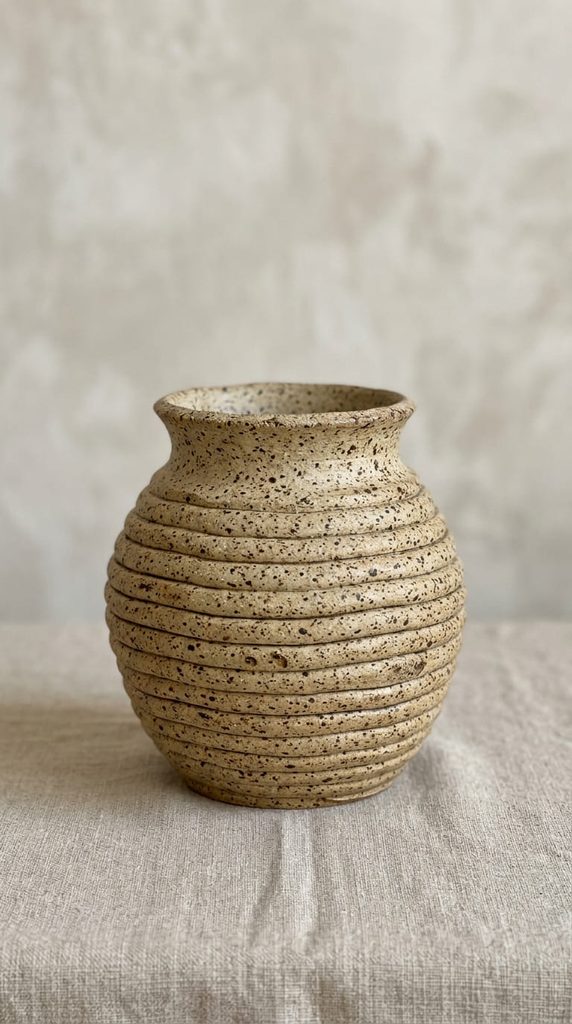
Speckled stoneware clay has little natural flecks baked right in, so you get texture and visual interest without adding a single design element yourself. Basically the “wear sweatpants and still look put together” of coil pots.
Pair it with a clear glaze so the speckles actually show through. This is one of my go-to picks for gifting, honestly, since it looks polished with barely any effort on my end, and most craft stores carry a small block of it for just a few dollars.
11. Coil Pot with Handles
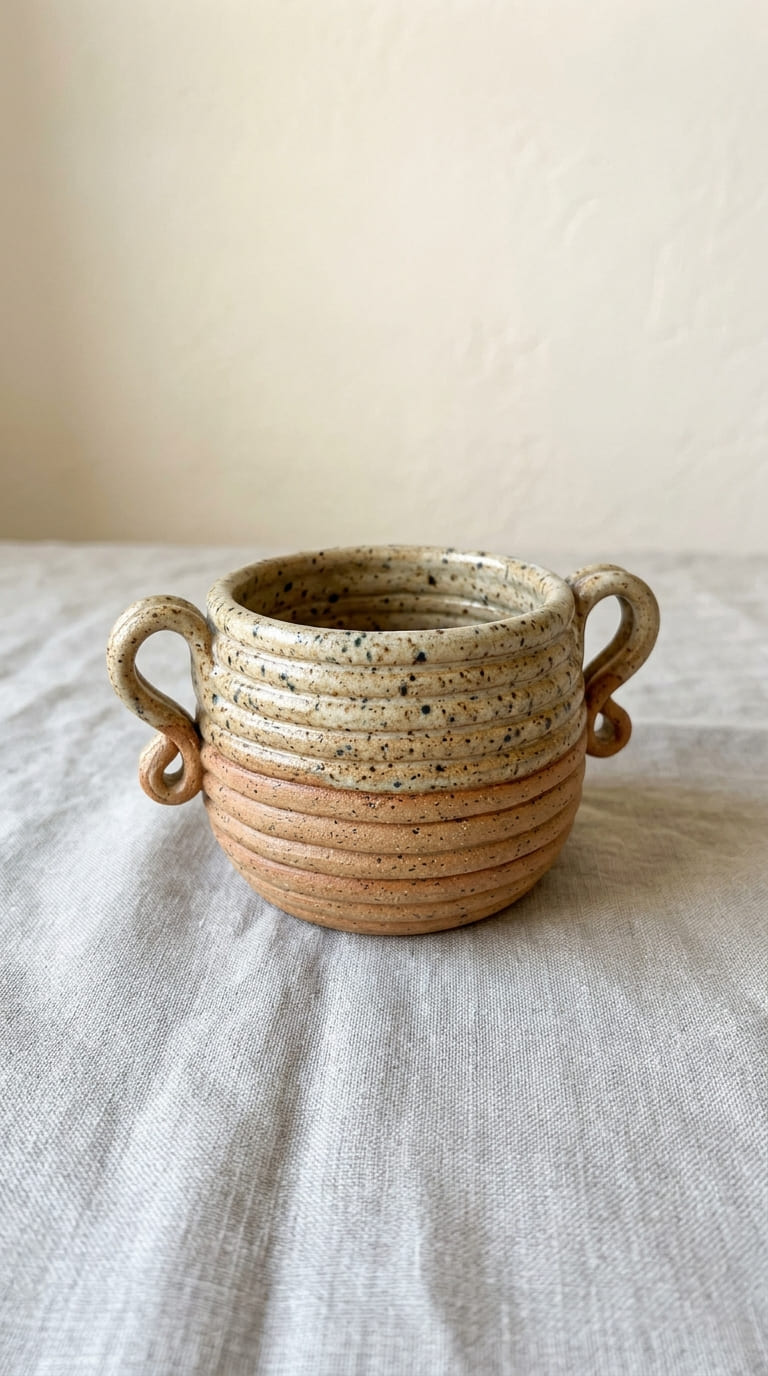
Add two small coil handles to the sides for a more functional, mug-like shape. Score and slip them onto the body just like any other coil, then let the whole thing dry evenly so the handles don’t pull away as it shrinks.
This one gets used the most in my house, because it’s actually practical, not just decorative. Tip that saved me a few cracked handles: attach them while the body is still a little soft, not once it’s stiffened up, so both pieces shrink at roughly the same rate.
12. Mini Coil Pot Set
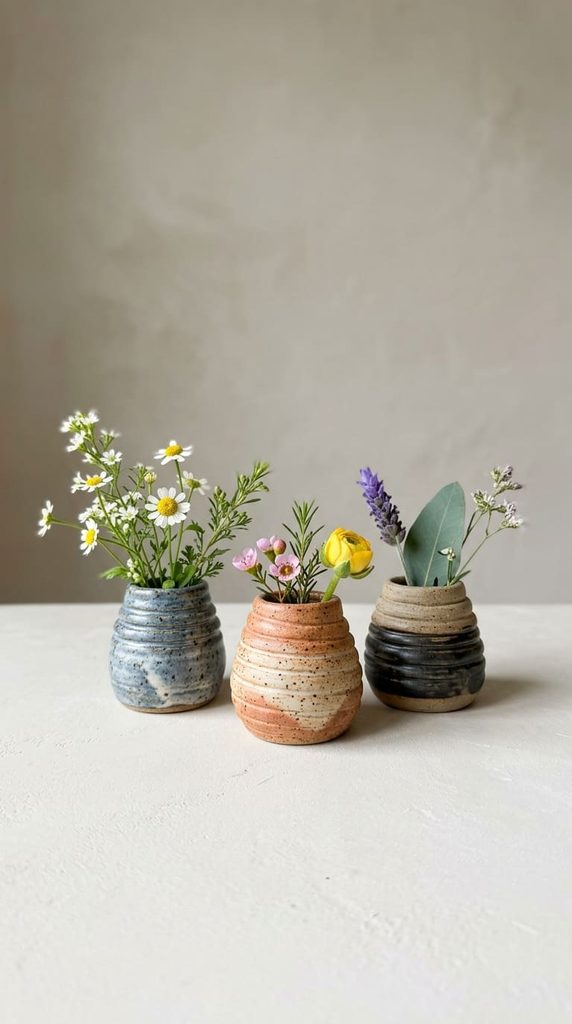
Instead of one larger pot, make a little cluster of three or four mini ones in different heights. Bud vases for single stems, or just grouped together on a shelf. This is genuinely one of my favorites on this list, fast, low pressure, and it looks intentional even when each one turns out a little different.
Great starter project too, if you’re teaching a kid or a friend how to coil. A small pot comes together in under fifteen minutes, and mistakes feel a lot lower stakes on something tiny.
13. Coil Pot with Painted Accents
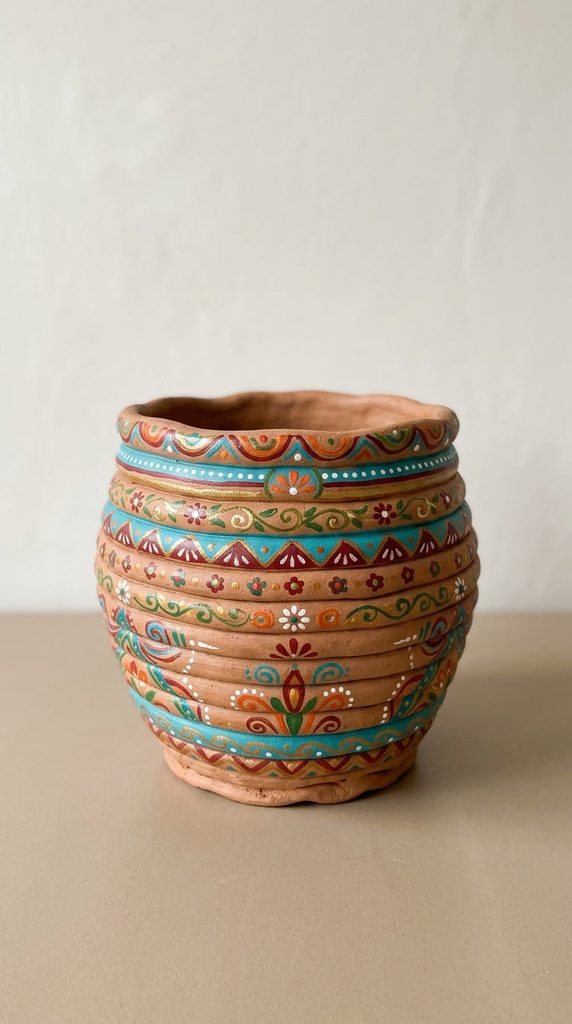
Keep the clay body natural and unglazed, then add small painted details after it’s fired: tiny dots, a stripe near the rim, a little pattern around the base. Acrylic paint works fine if you’re skipping the glaze altogether. Simple, low-commitment way to add color without needing kiln access for a full glaze.
Just know that acrylic paint won’t hold up to water the way a glaze does, so this version is better suited to decorative use than anything that needs regular cleaning.
14. Textured Fingerprint Coil Pot
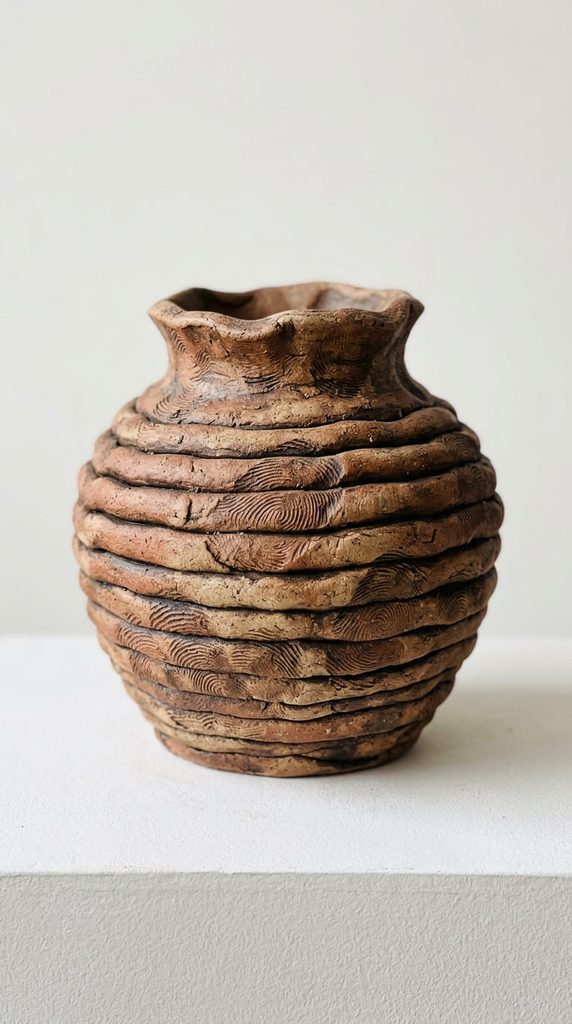
Press your fingertips gently into the clay as you smooth each coil, instead of erasing every mark. The result is a subtle, all-over texture that feels handmade in the best way, and it costs zero extra effort since you’re already touching the clay anyway. You’re just not smoothing away the evidence.
I like pairing this with a matte glaze in a neutral tone. A glossy finish tends to flatten the texture instead of highlighting it.
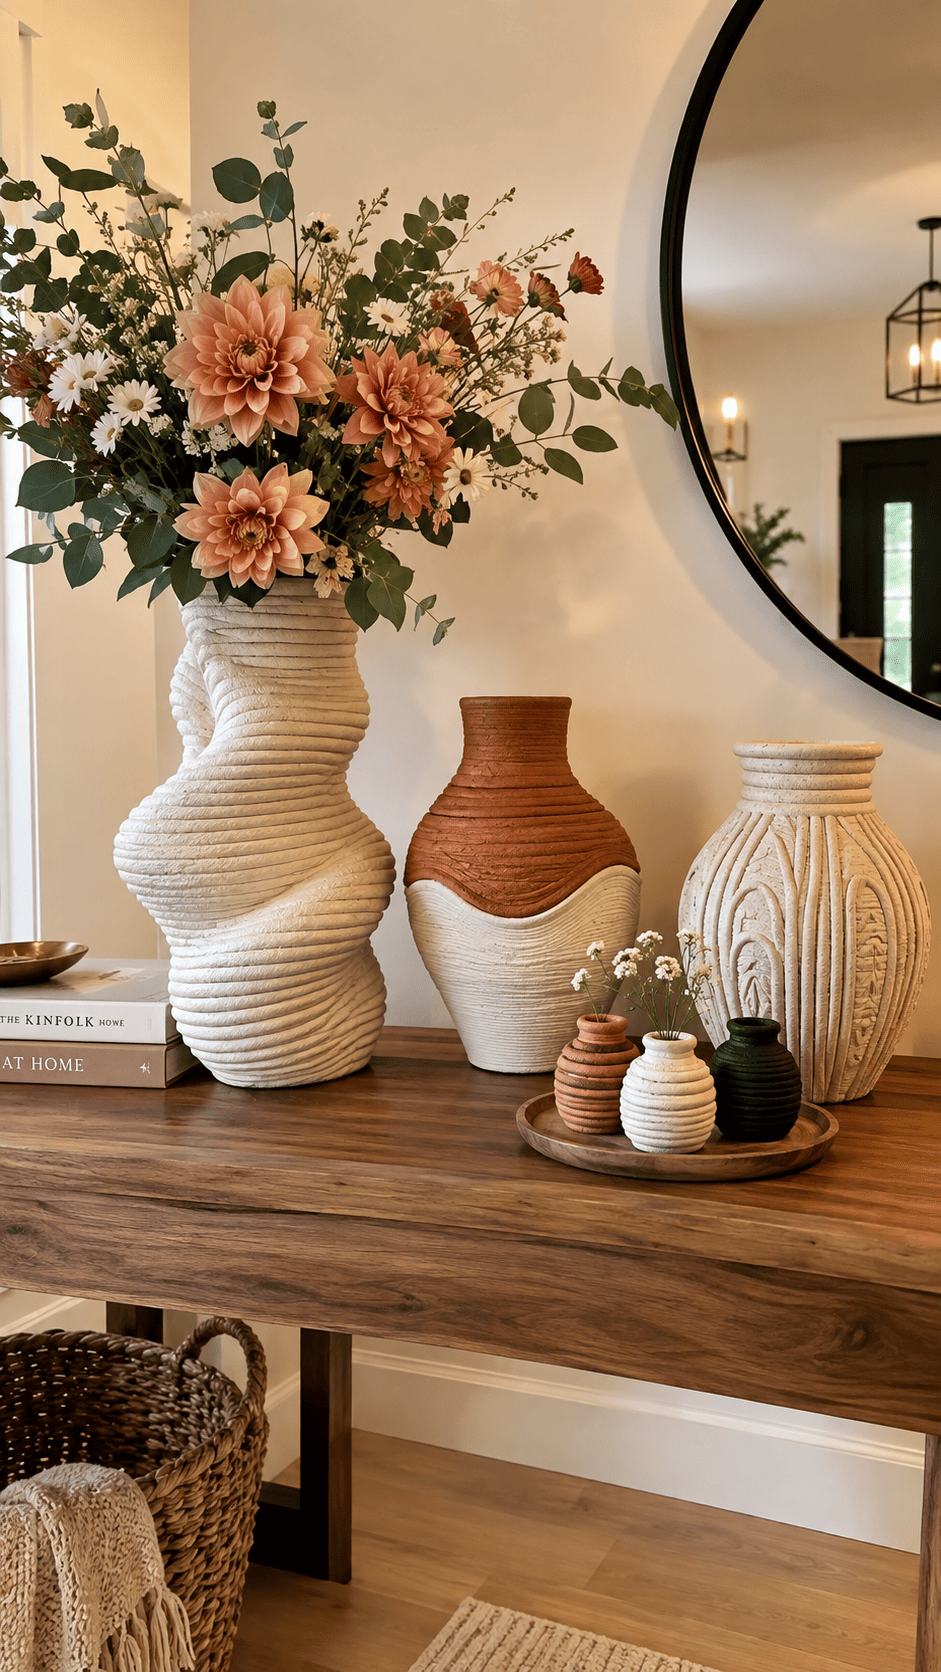
15. Statement Sculptural Coil Vase
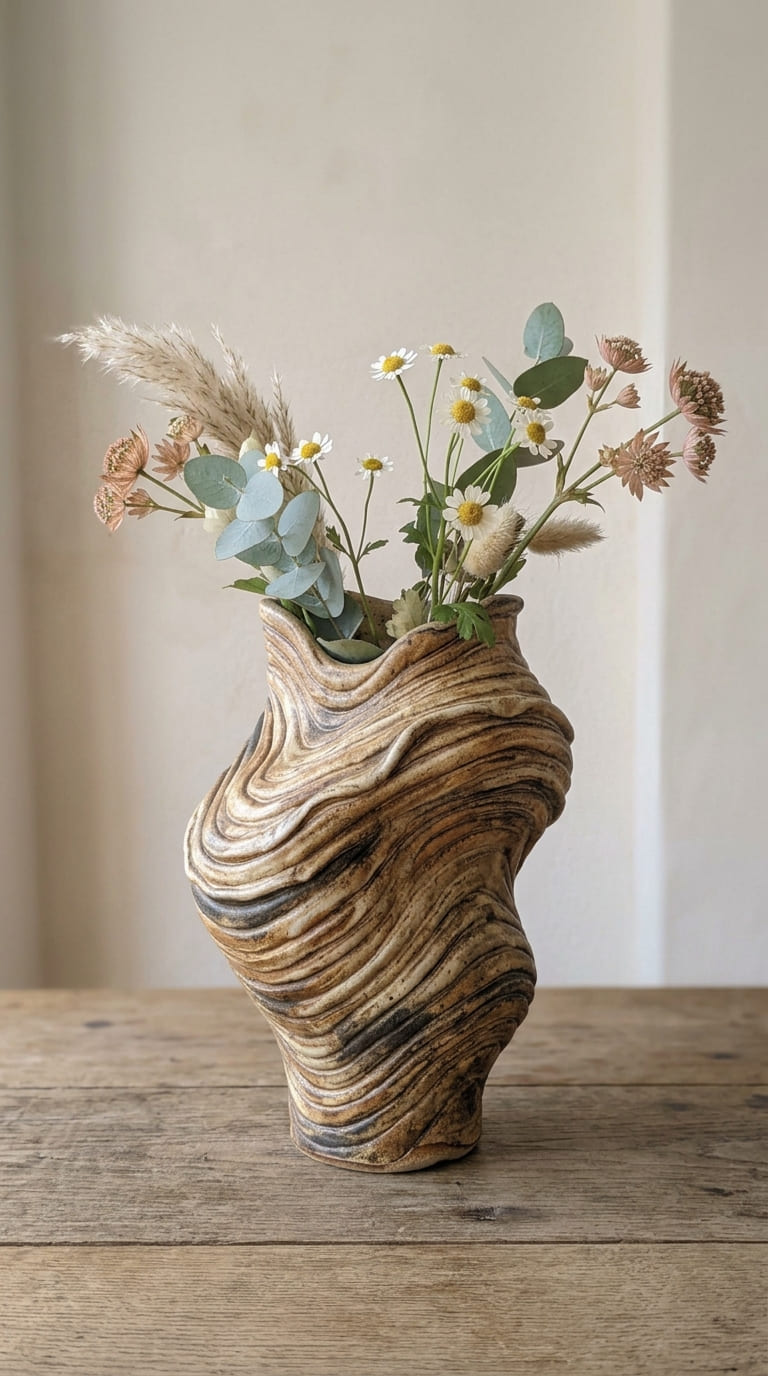
Once you’ve got a few basic pots under your belt, try something taller with an irregular, curving silhouette instead of straight sides. Let it bulge in the middle. Let it lean slightly to one side, on purpose.
This is the one that gets the most compliments in my house, sitting on its own on a console table like the little piece of art it’s become.
Frequently Asked Questions
What clay is best for coil pots?
Air-dry clay works well for beginners since it needs no kiln, but stoneware clay is more durable and better if you plan to actually use the pot for water or plants. Stoneware needs to be fired in a kiln to become fully hardened, and glazed if you want it waterproof. Just testing out the technique for now? Air-dry clay is the more forgiving, budget-friendly choice.
How do you keep coils from cracking?
Cracking usually happens when coils are joined without scoring and slipping first, or when a piece dries too fast. Score both surfaces, add a small amount of water, and press firmly before smoothing. Let your pot dry slowly and evenly, away from direct heat or sunlight, and cover it loosely with plastic for the first day or so if your home tends to run dry.
Do coil pots need to be fired in a kiln?
Only if you’re using stoneware or earthenware clay. Air-dry clay pots simply cure at room temperature over a few days and never need firing, though they stay more fragile and aren’t meant to hold water long-term.
How long does a coil pot take to make?
A simple small pot can take as little as thirty minutes to build. Larger or more detailed pieces can run a couple of hours spread across a few sessions, mostly to keep the walls from collapsing under their own weight. Drying adds several more days on top of that.
Can beginners make coil pots without a pottery wheel?
Yes, and that’s really the whole appeal of coil building. It’s a hand-building technique, no wheel, no motor, no special equipment beyond tools you likely already own. Just a flat surface, your hands, and a little patience while you get a feel for how the clay behaves.
Coil pots reward patience way more than skill. Pick whichever idea speaks to you most and just start rolling. Your first one won’t be perfect, but it’ll probably be better than you think. And even if it isn’t, that’s kind of the fun of it. Some of my favorite pieces on my shelf right now started out as pots I was almost embarrassed to finish.